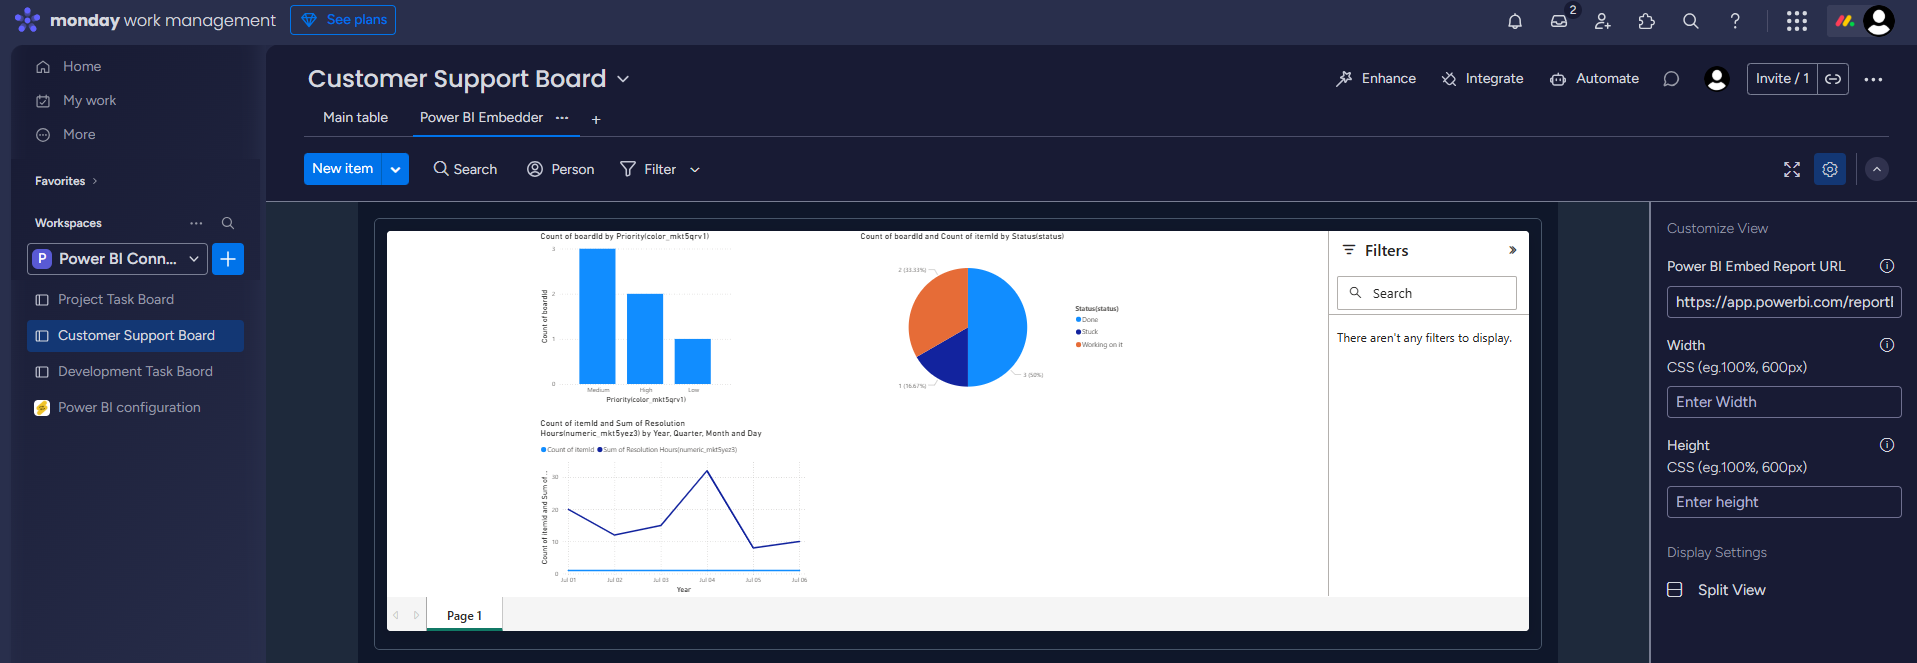

This section will provide the step-by-step procedure to create a connection between your monday.com board data and the Power BI desktop platform.
1. Create Connection
Step 1: Go to the Power BI Configuration window.
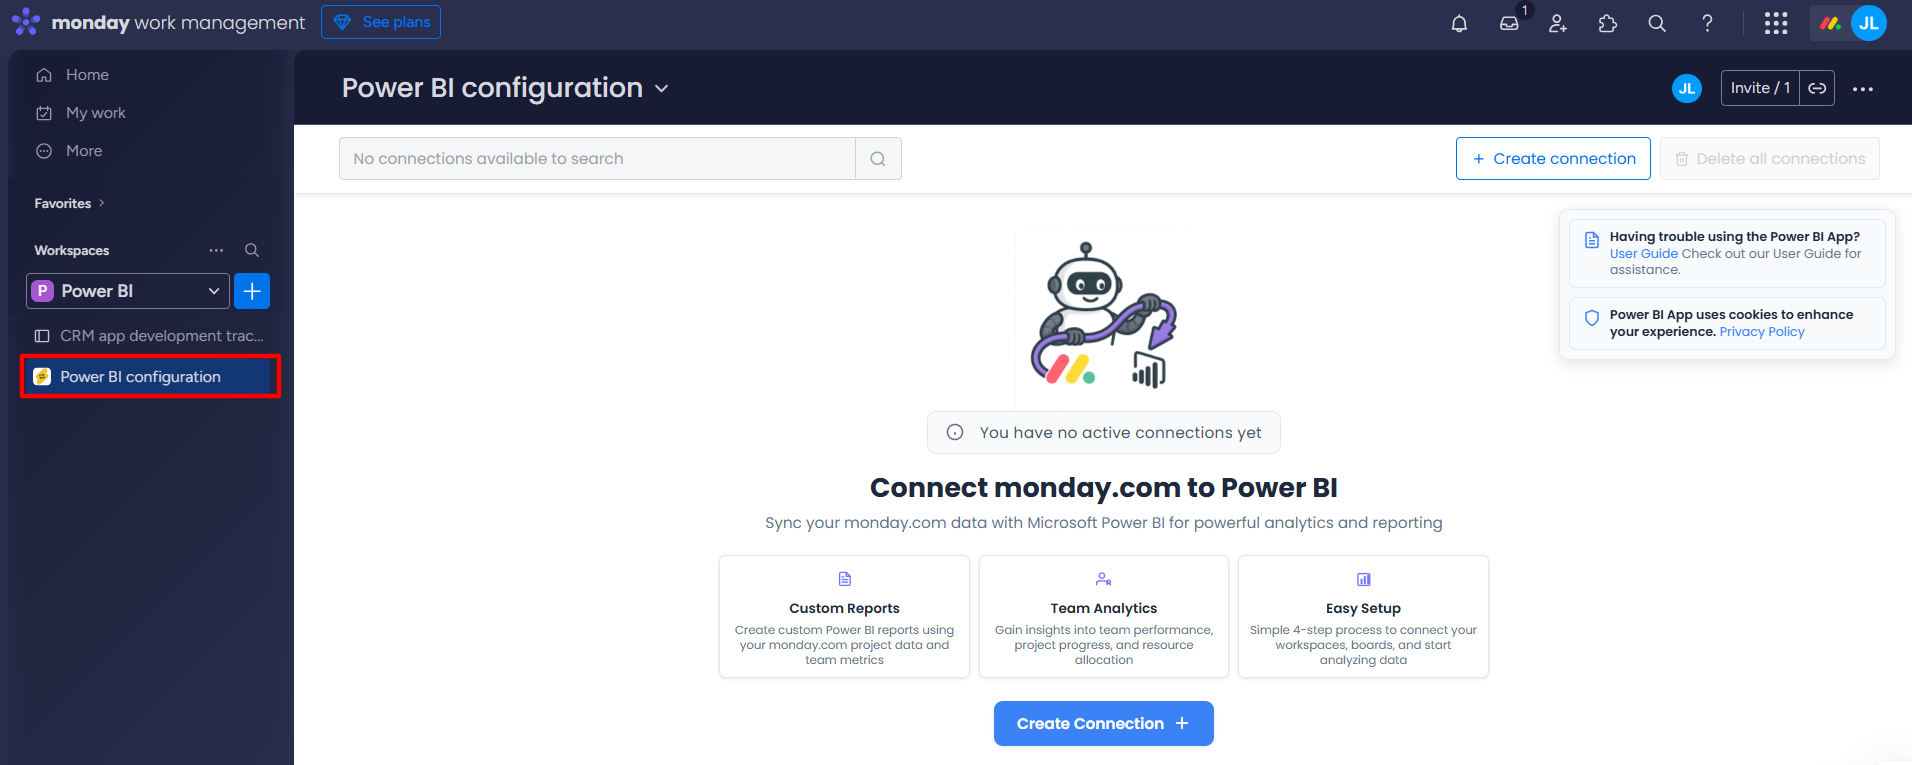
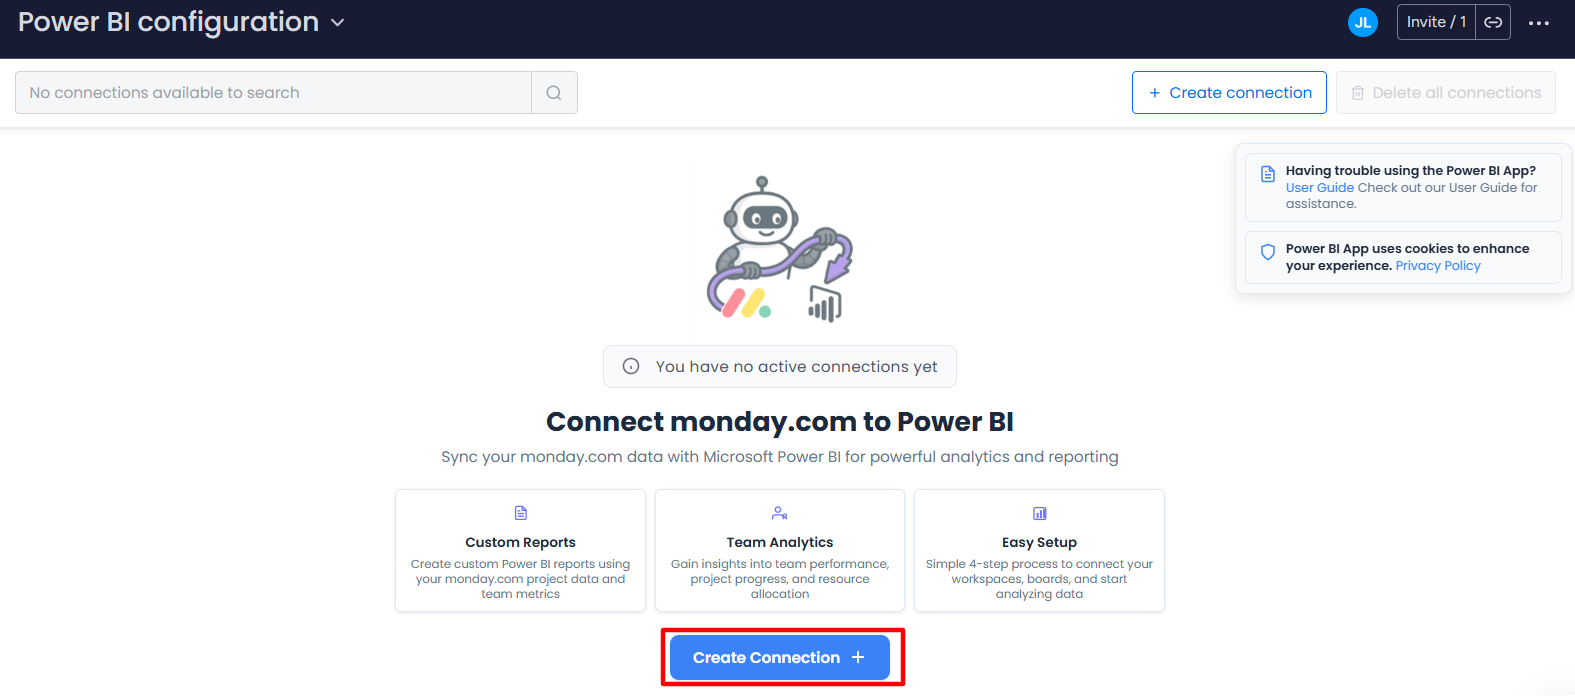
Step 2: Click on the Create Connection button.
Complete the four steps to generate the web link.
Step 3: Complete the four steps below to generate the web link.
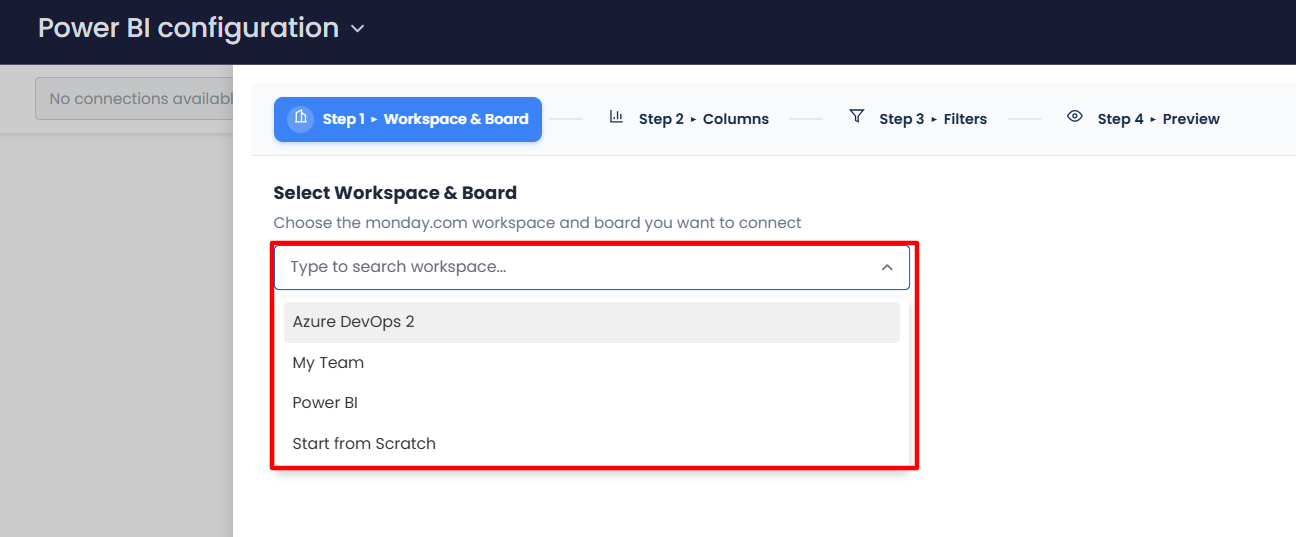
Step 1: Workspace and Board
-
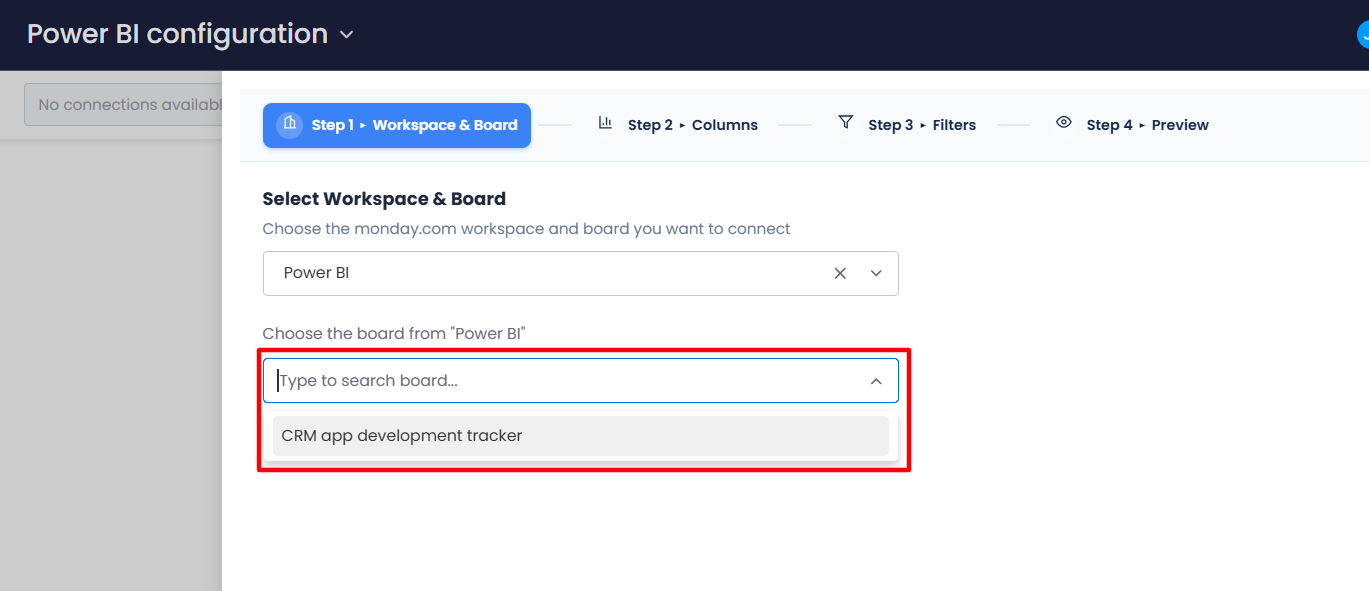
Click on the dropdown and choose the monday.com workspace.
-
Click on the dropdown and choose the board.
-
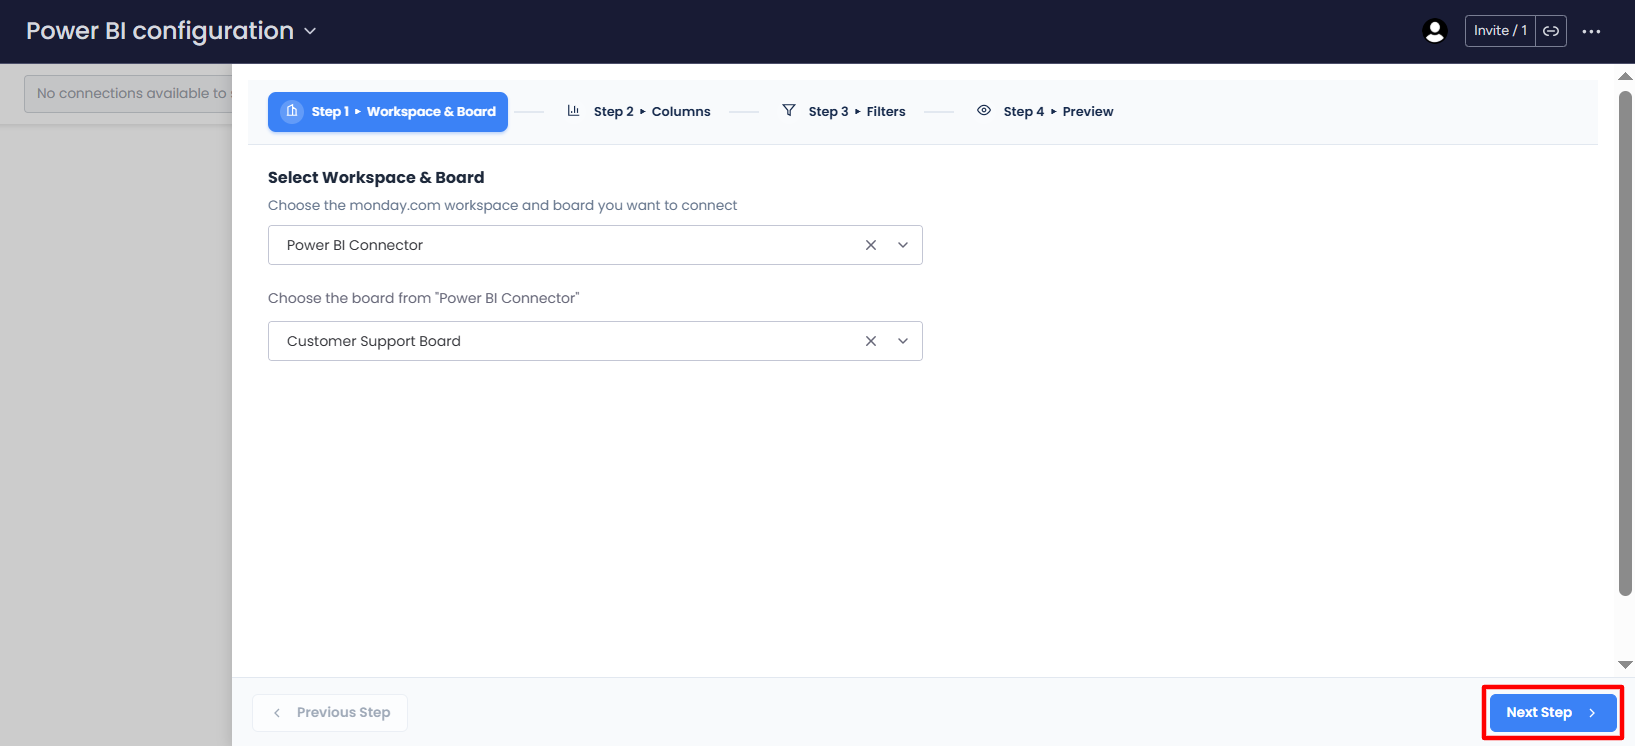
After selecting the workspace and board, click on Next Step.
Step 2: Column Selection
-
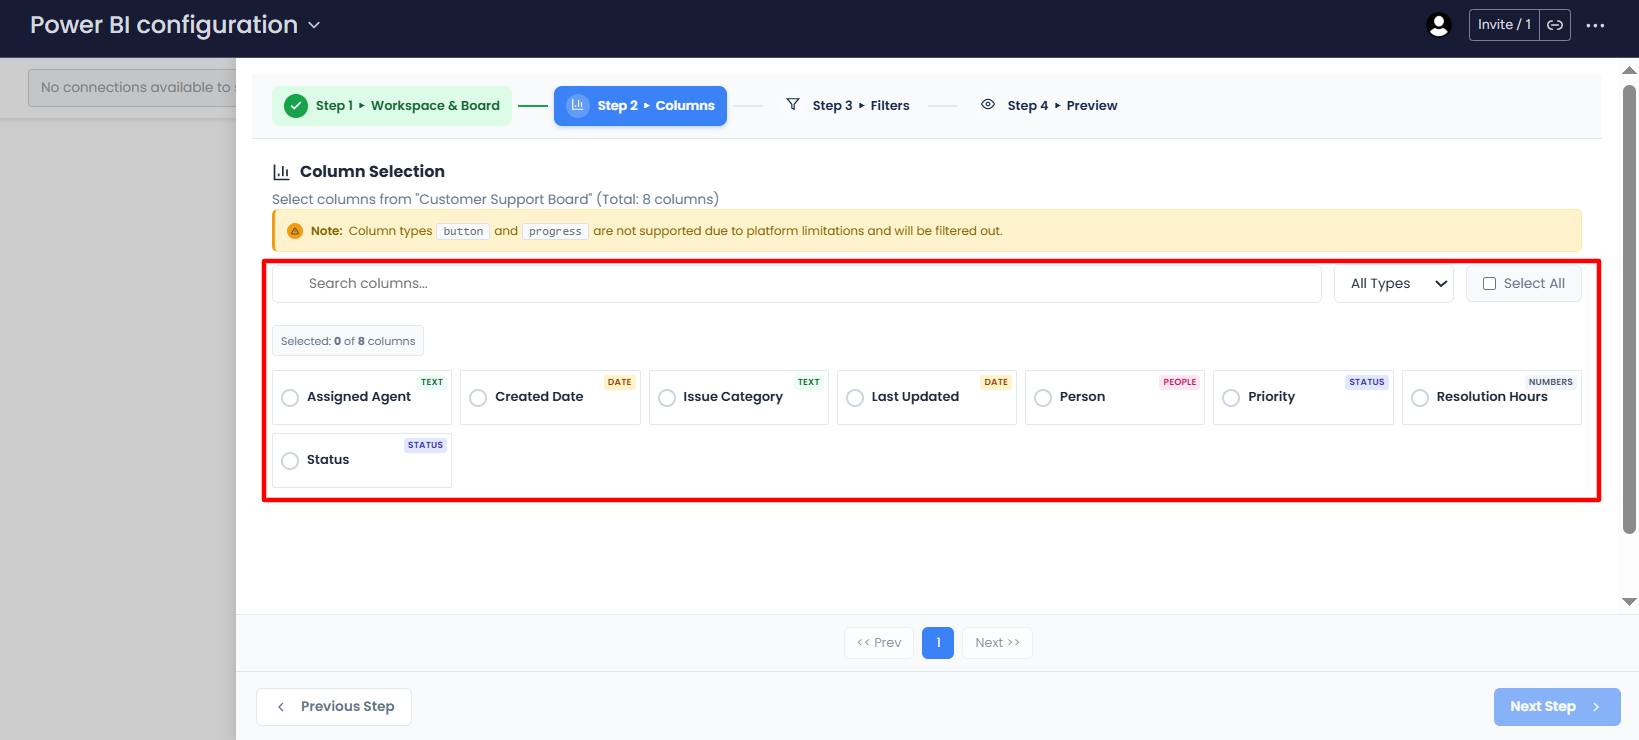
Search and select the required board columns for Power BI data modeling
-
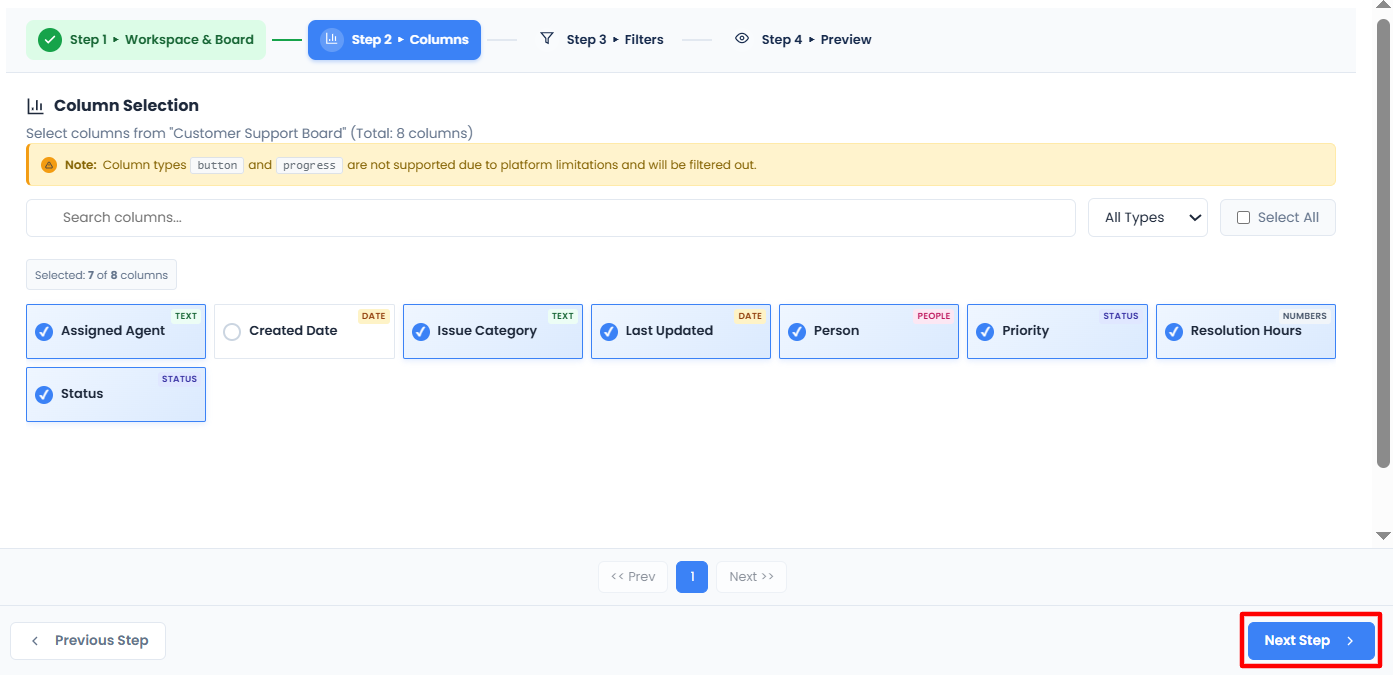
After selecting the columns, click on Next Step.
Step 3: Data Filtering (Skip this step if not required)
-
Apply filters to the table columns to send only the required data to generate the Power BI report.
-
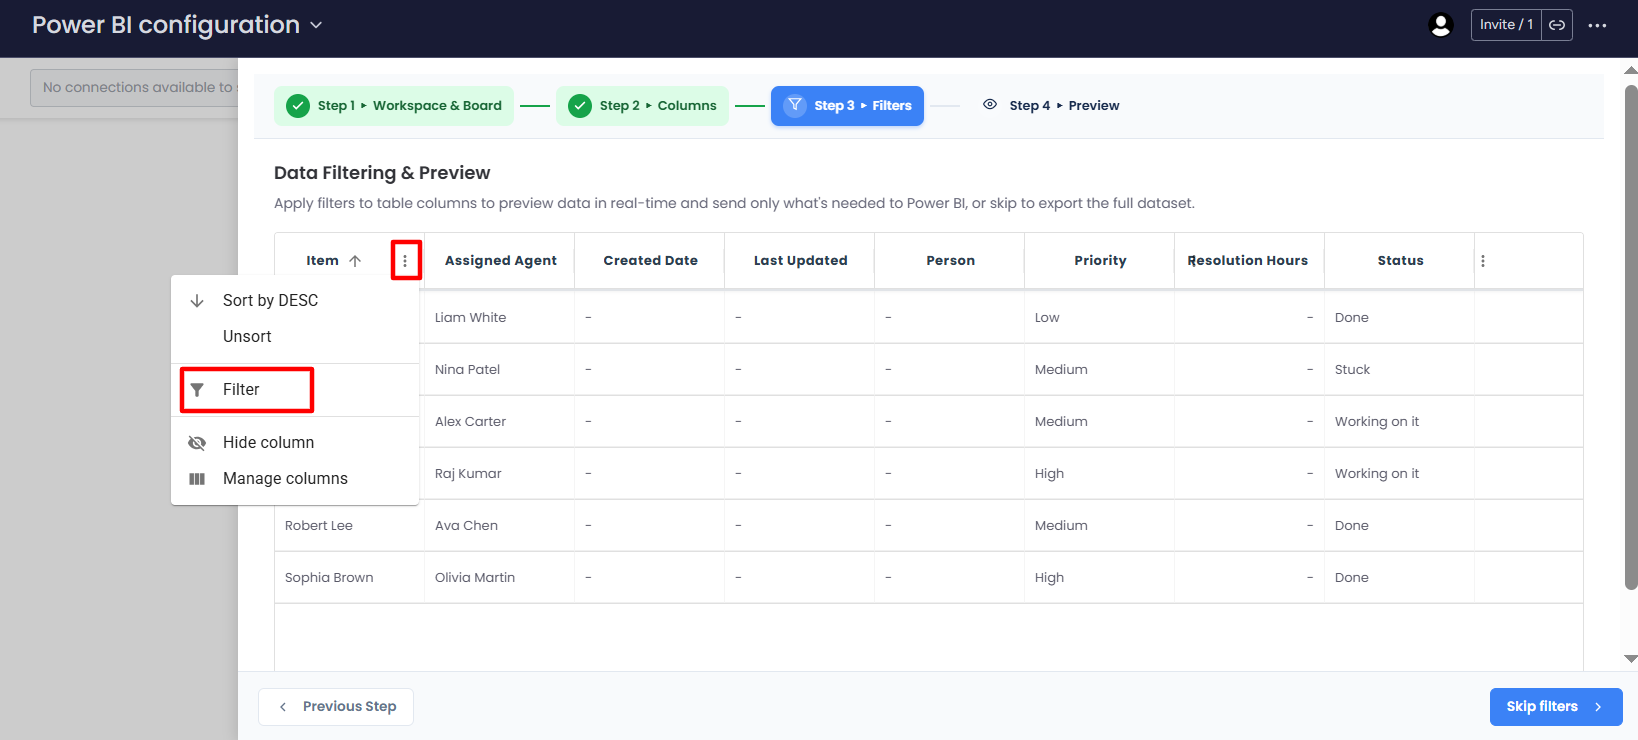
Click on the column menu button to apply the filter to that column.
-
Select the Filters option.
-
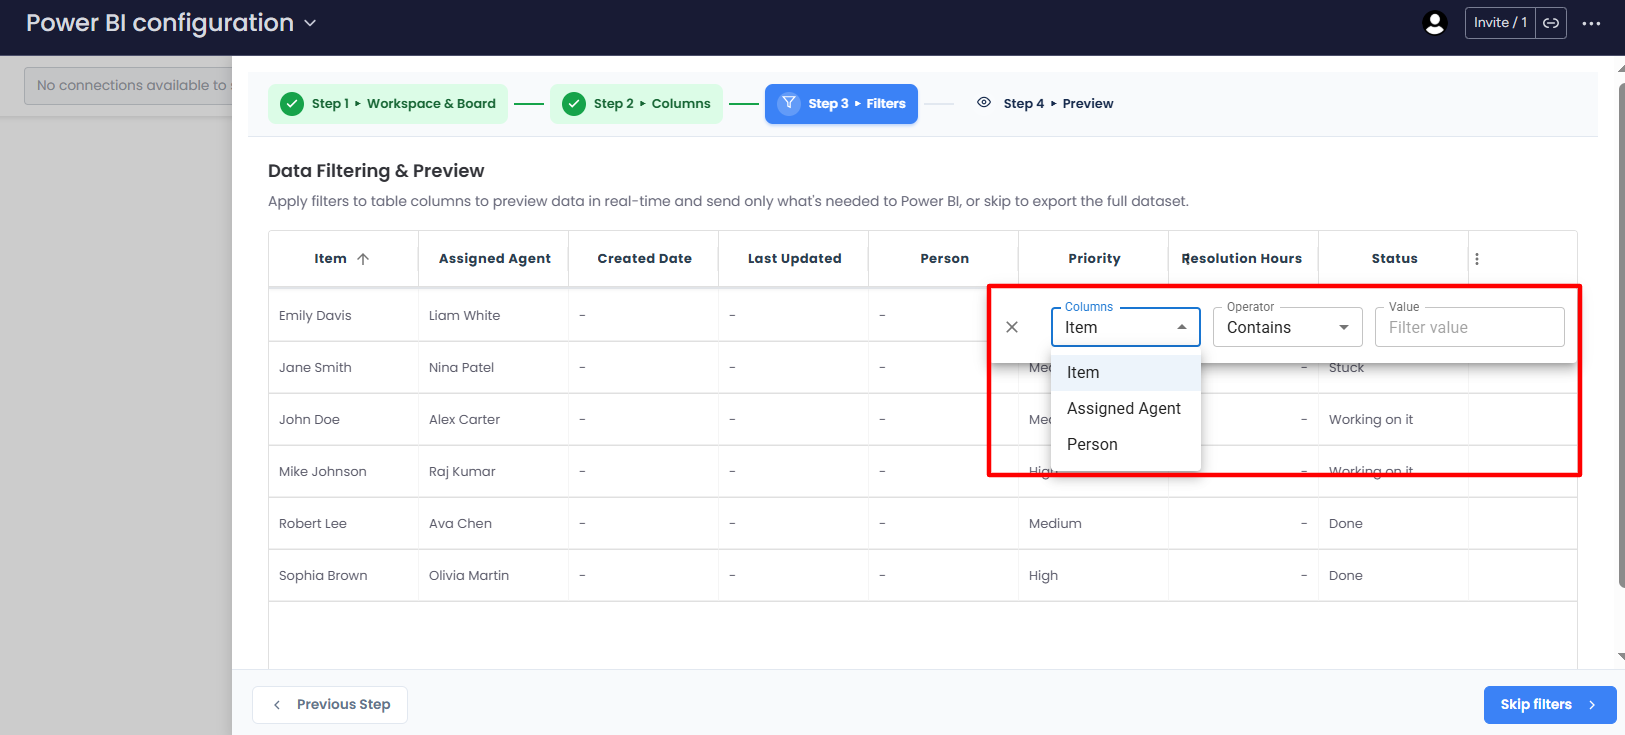
Select Columns and Operator from the dropdown and add the value to apply the filters.
-
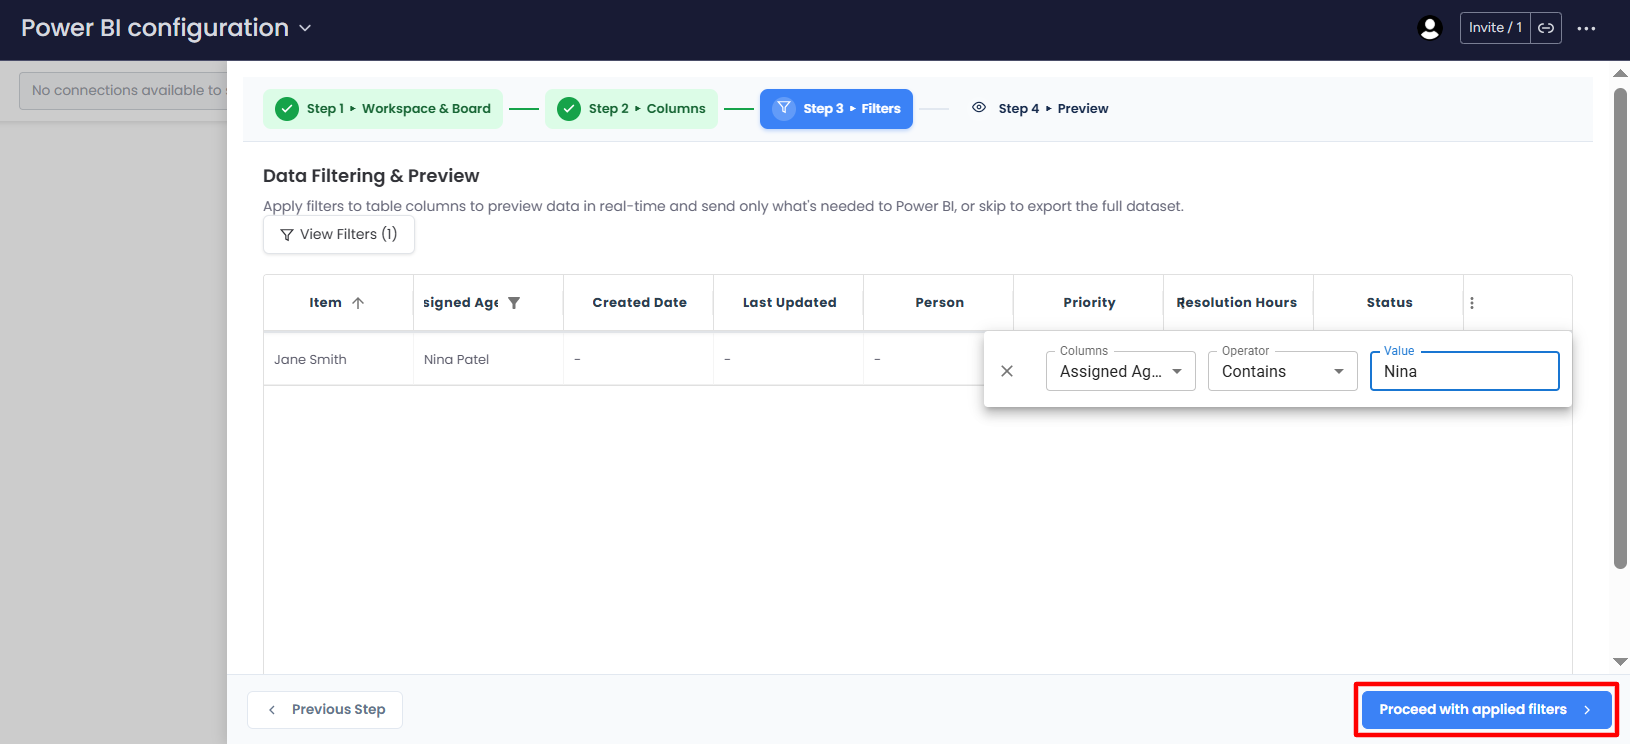
Next, click on the Proceed with applied filters button.
Step 4: Preview
Preview the configured data set and click on the Create Connection button.
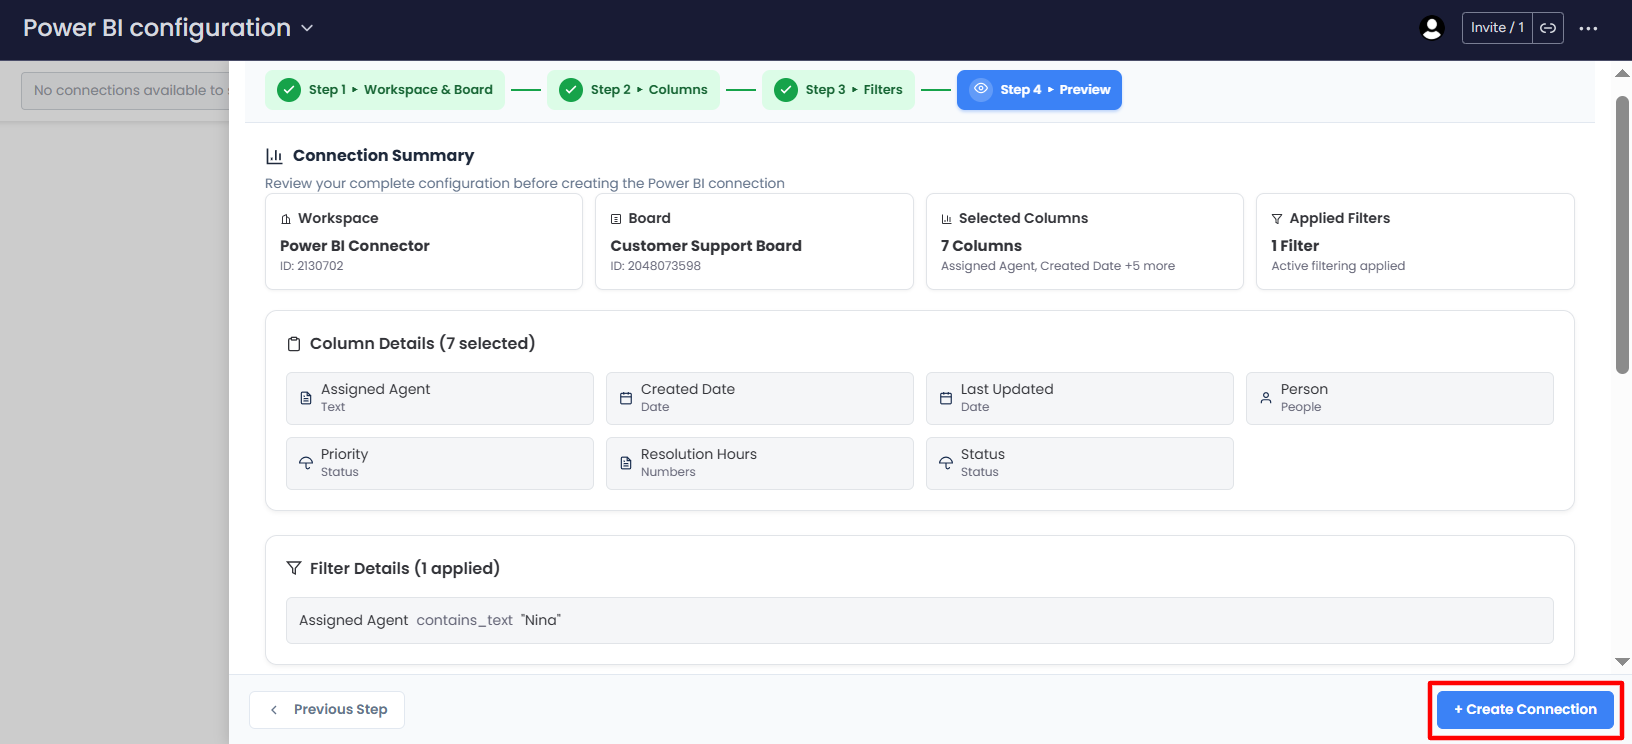
After completing the four steps, monday.com data is connected to Power BI, and the Feed URL is generated to create reports, visuals, and dashboards on the Power BI desktop app.
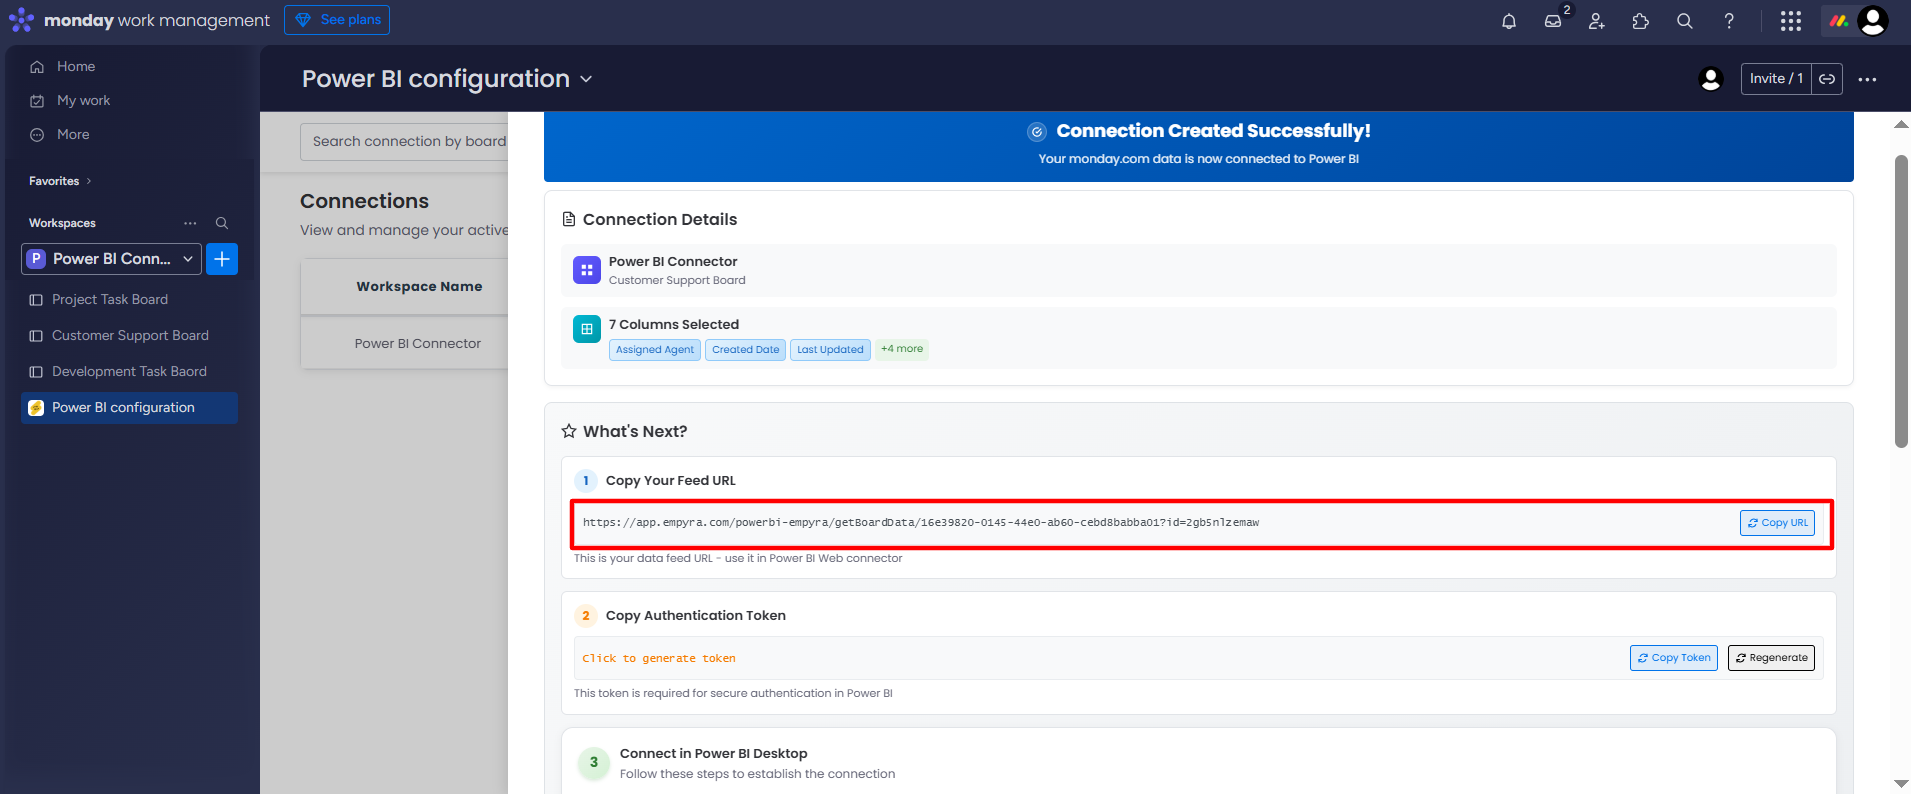
Connection details are available on the Power BI Configuration board.
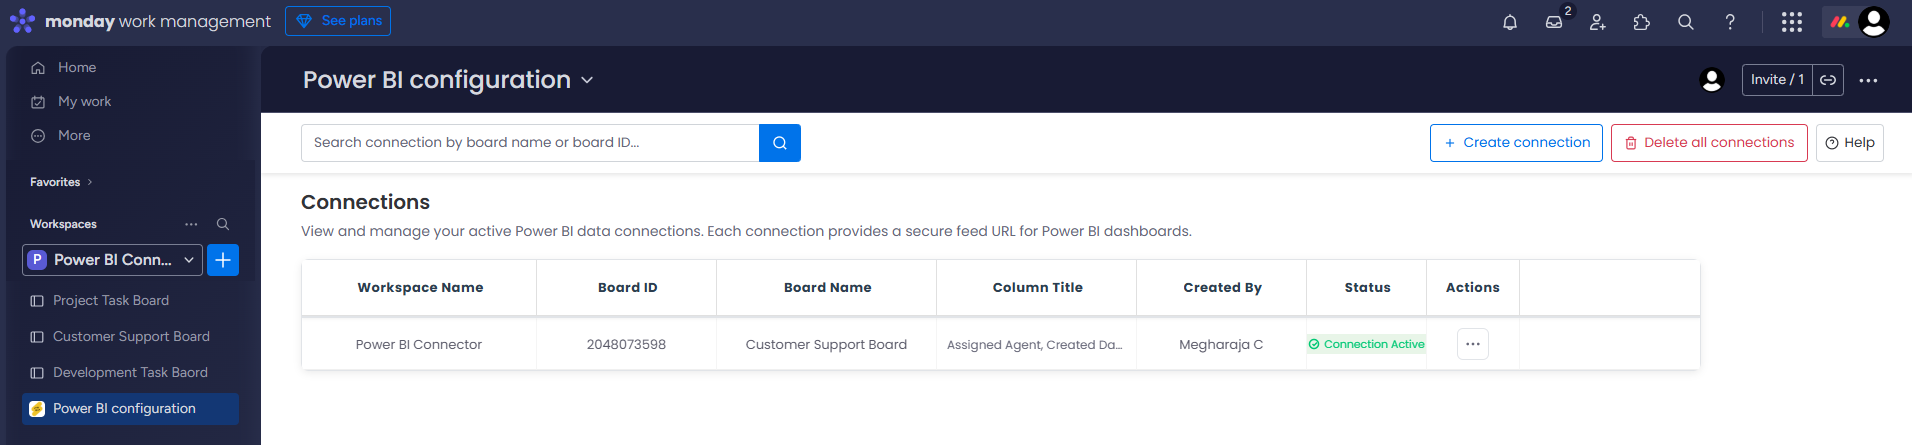
2. Edit or Delete the Connections
Step 1: Go to the Power BI Configuration board.
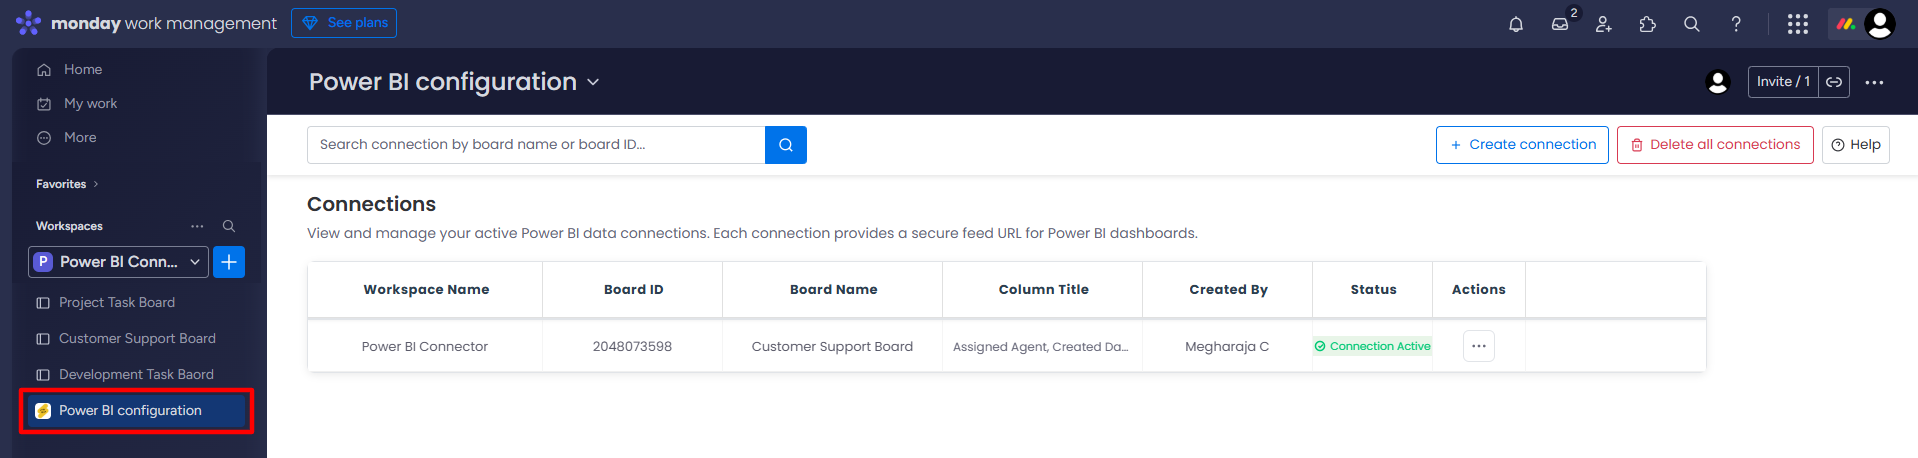
Step 2: Click on more actions.
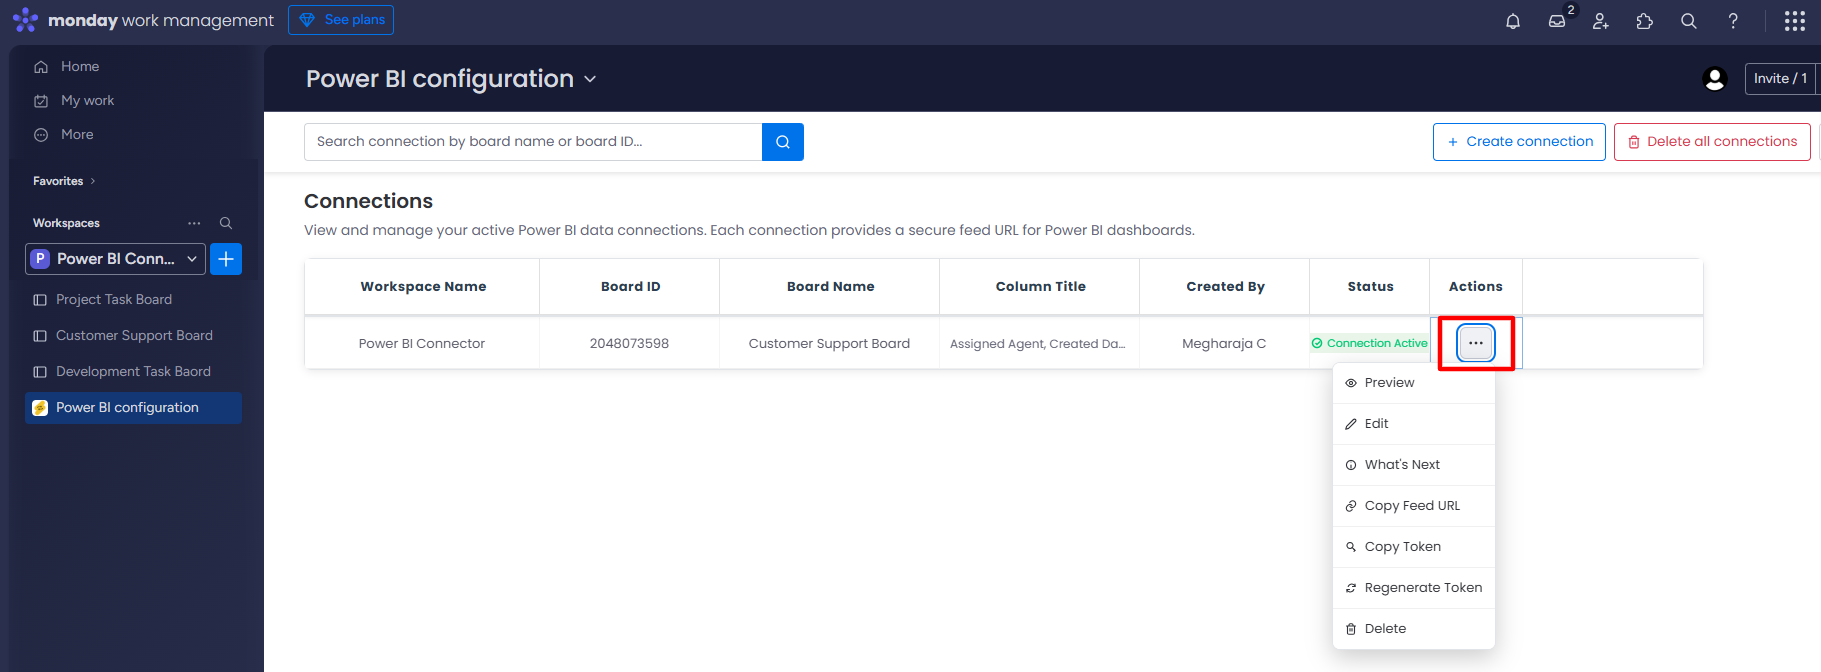
Step 3: Click on the Edit option to edit the connection details.
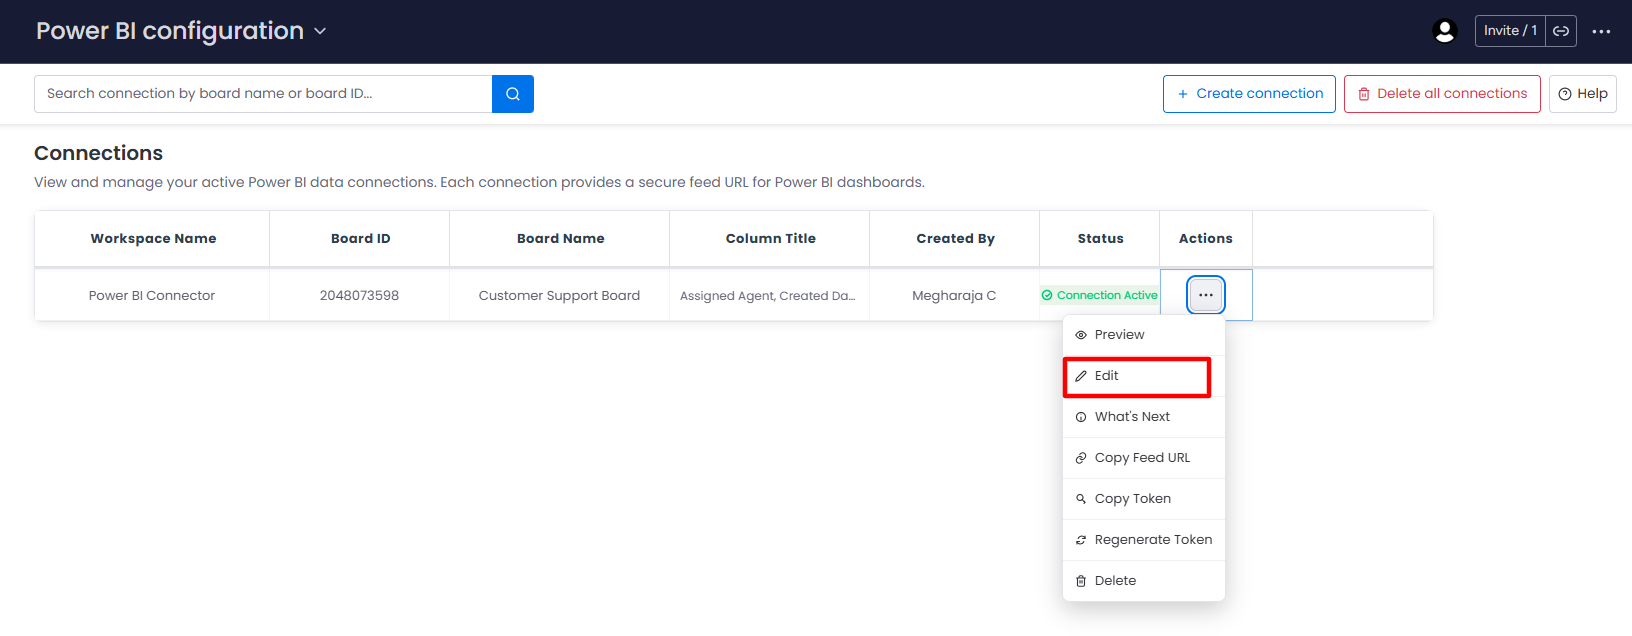
-
Go to Step 1 to edit the workspace and board details.
-
Go to Step 2 to edit the column selection.
-
Go to Step 3 to edit the applied filters or to add new filters.
-
Go to Step 4 to preview the changes.
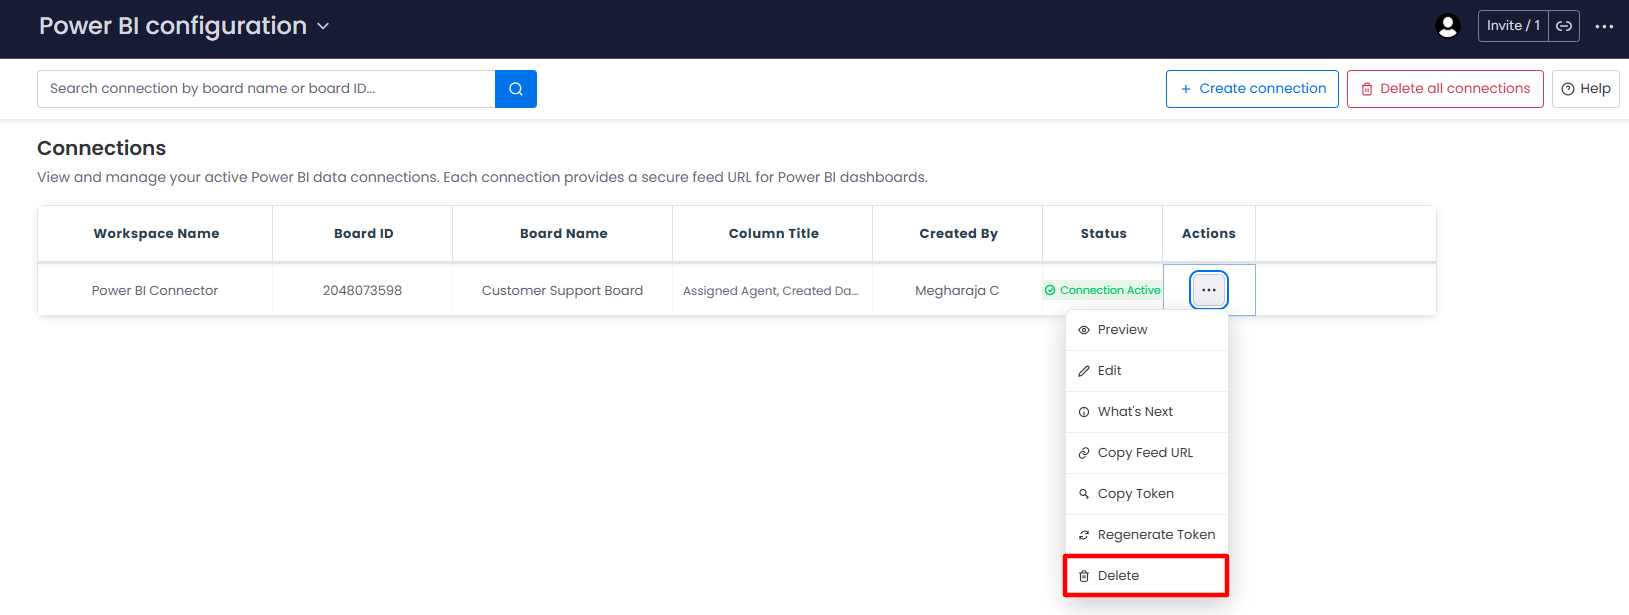
Step 4: Click on the Delete option to remove the connection from the list.
Use the 'Delete all connections' button to remove all connections from the list at once.
3. Generate Reports on the Power BI desktop app
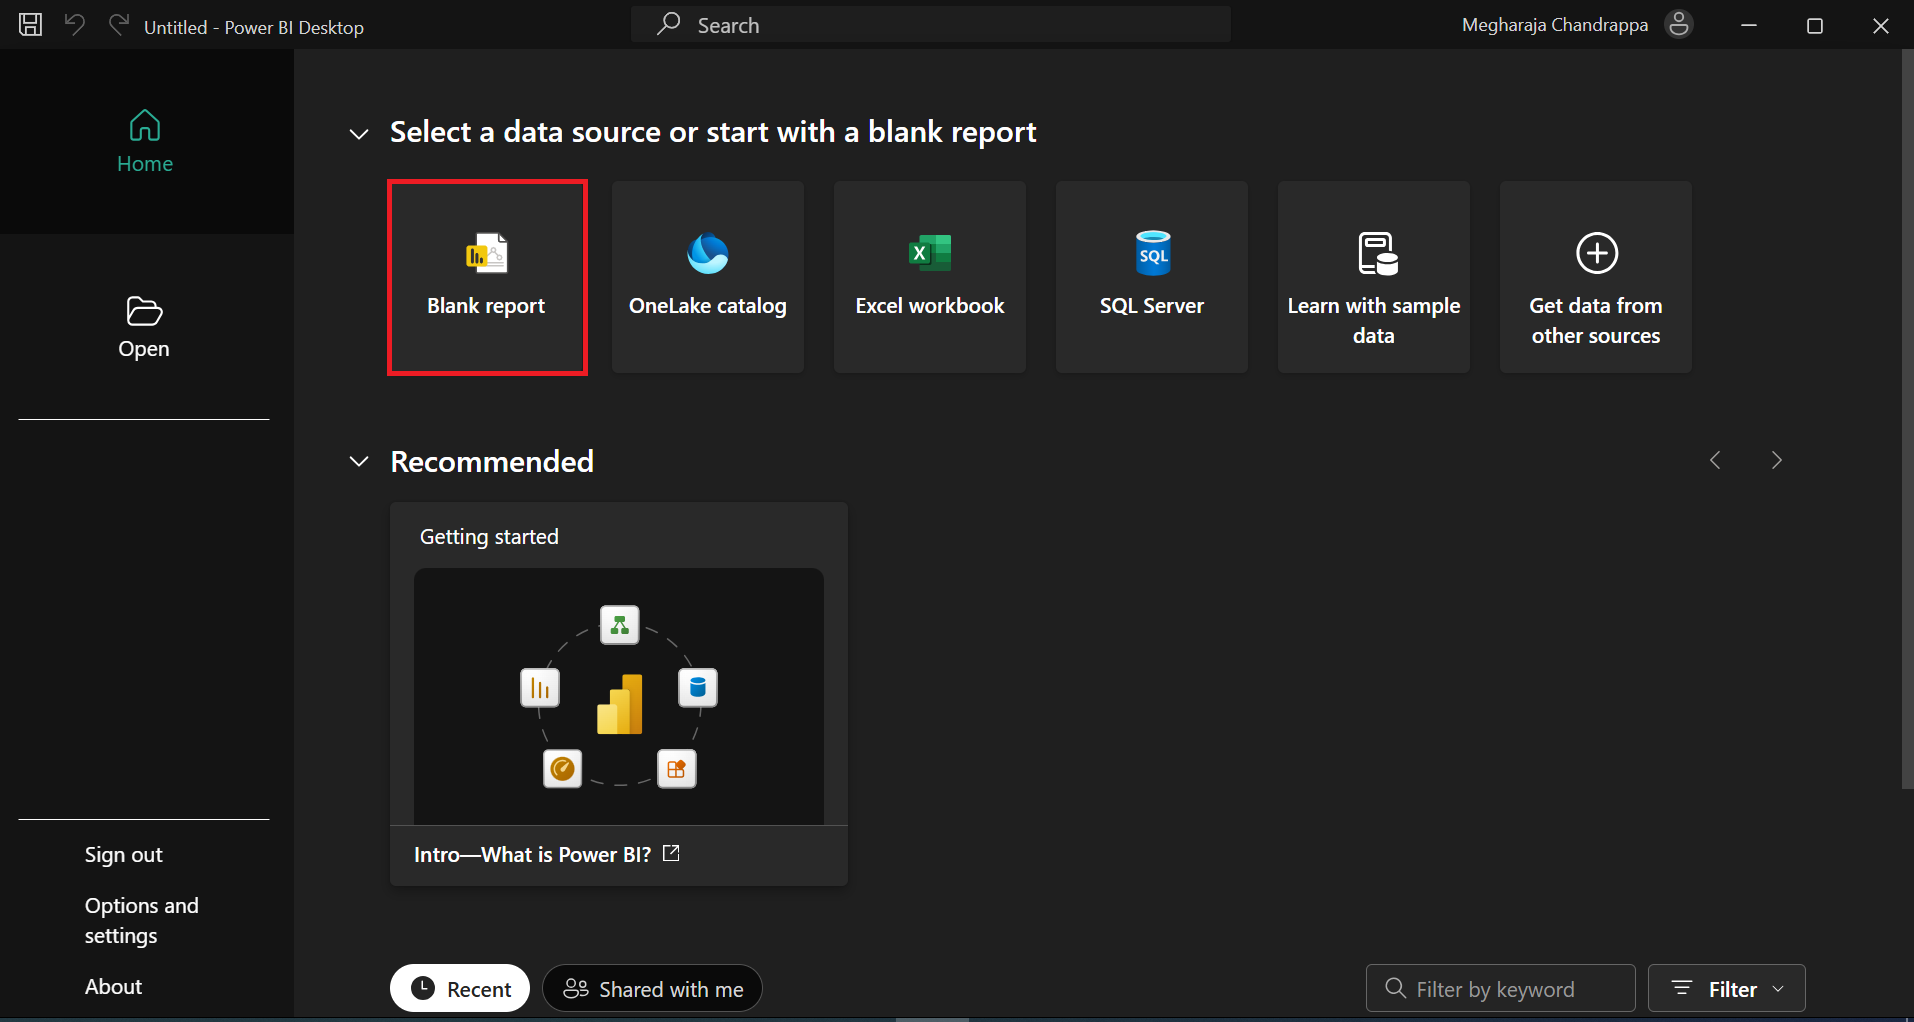
Step 1: Open the Power BI desktop app.
Step 2: Click on Blank report.
Step 3: Click on the Get Data dropdown and select the Web option.
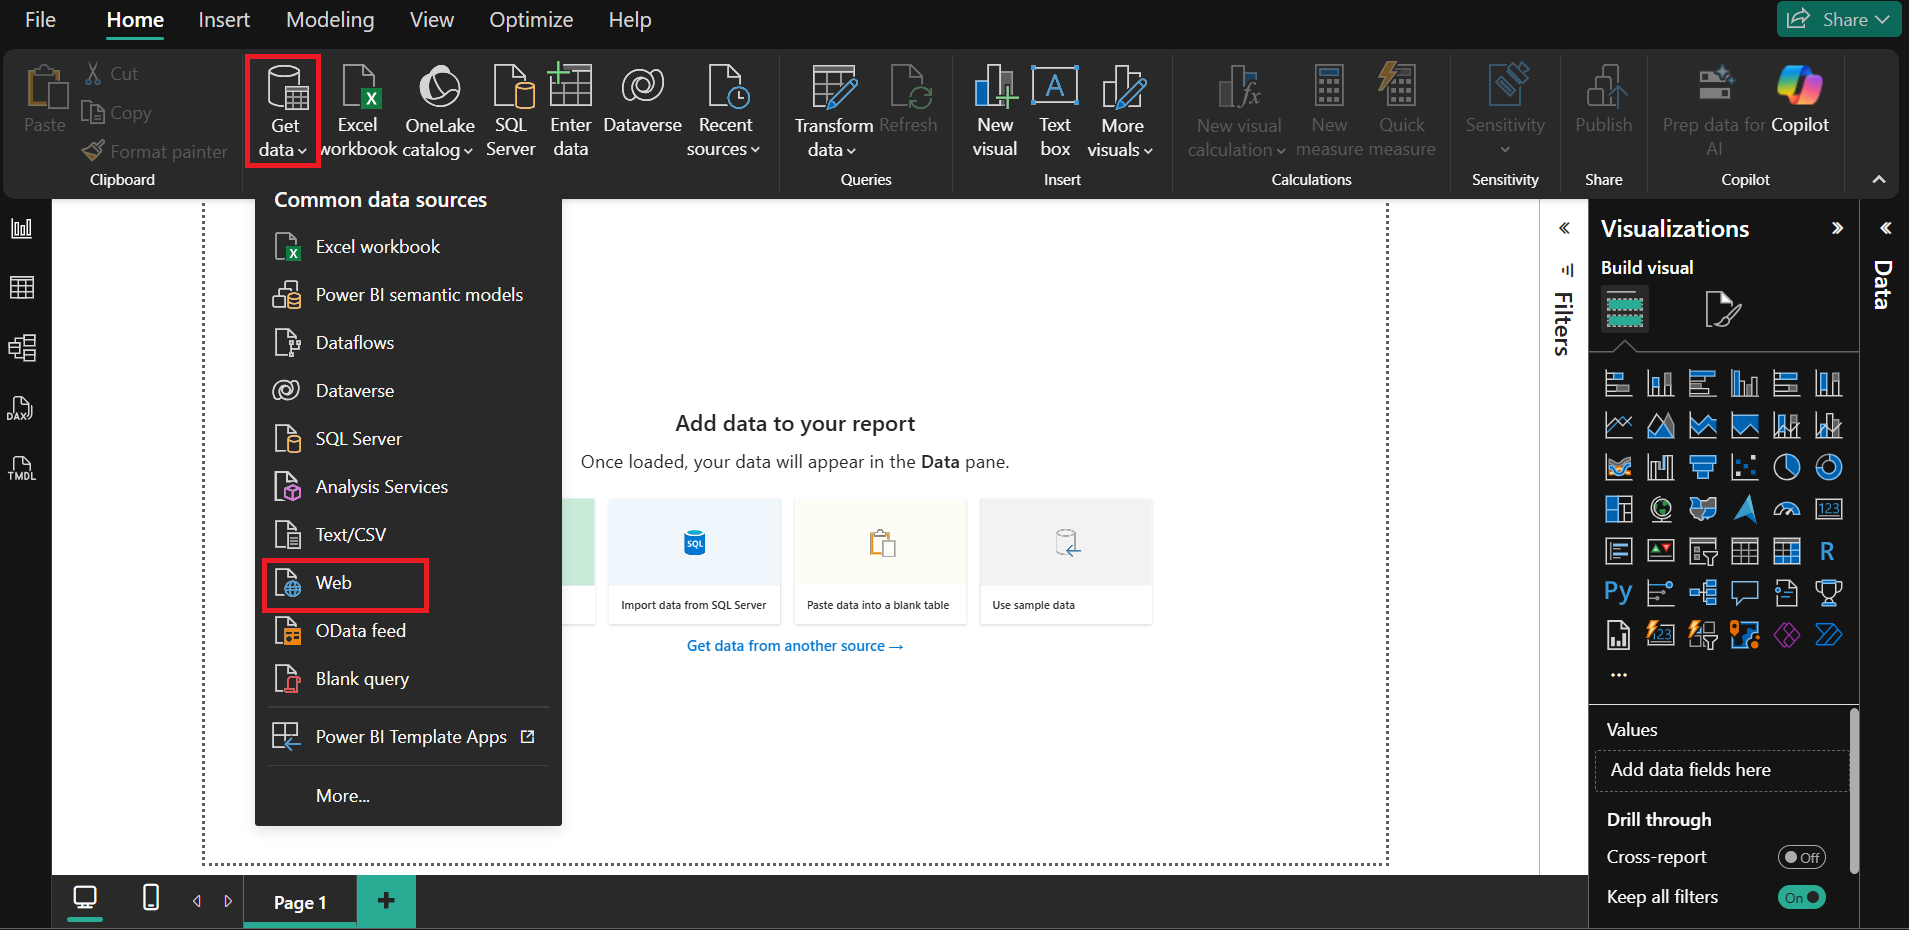
Next, add the Feed URL to the Web window.
Step 4: Go to the Power BI Configuration board on monday.com.
Step 5: Click on more actions, then click on the Copy Feed URL.
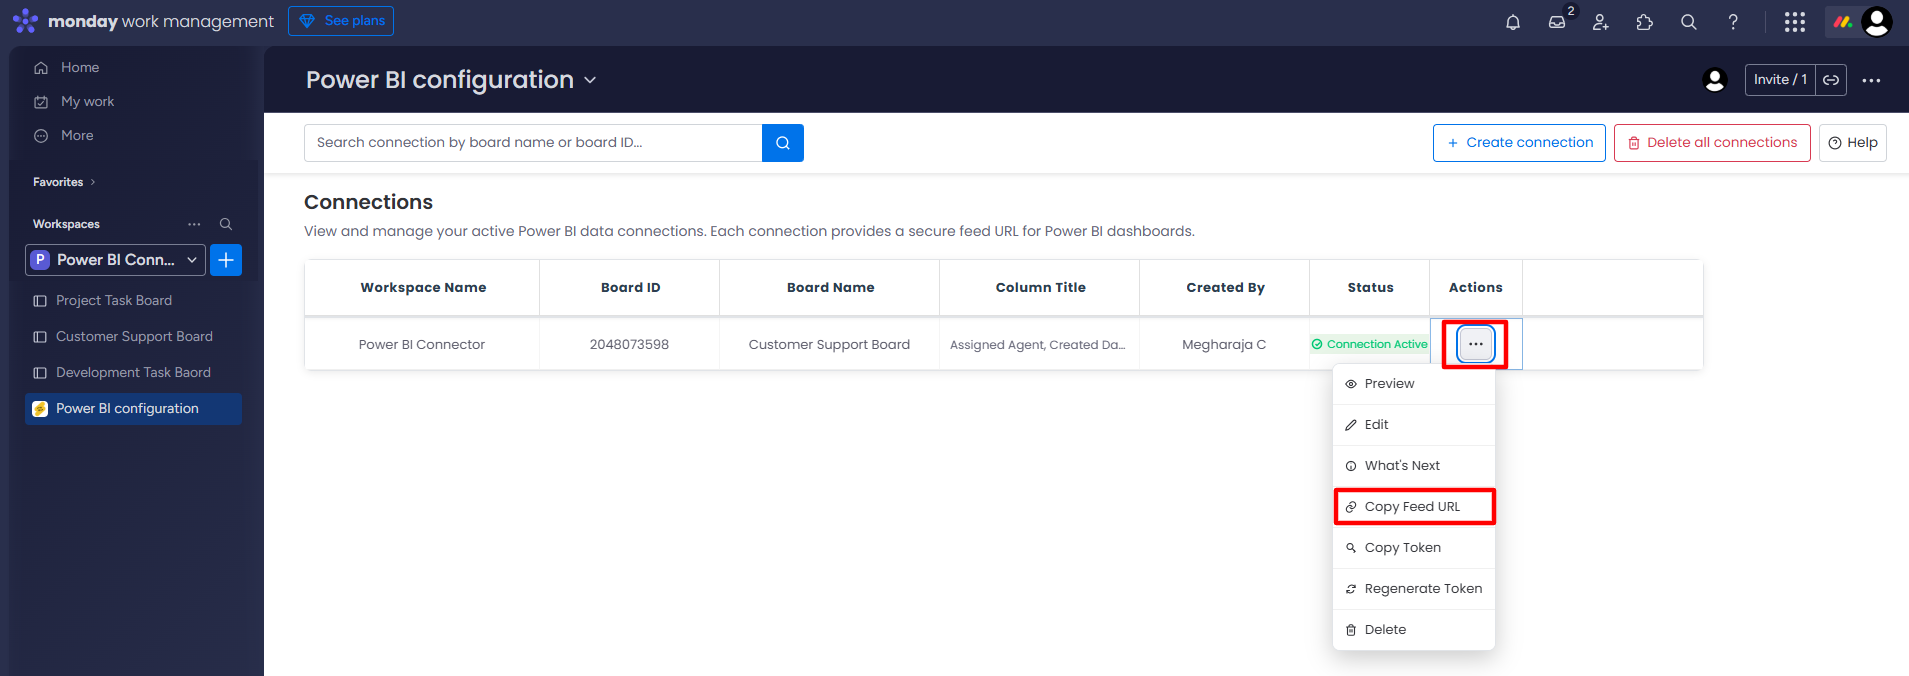
Feed URL will be copied to your clipboard.
Step 6: Paste the Feed URL in the Power BI Web window and click on OK.
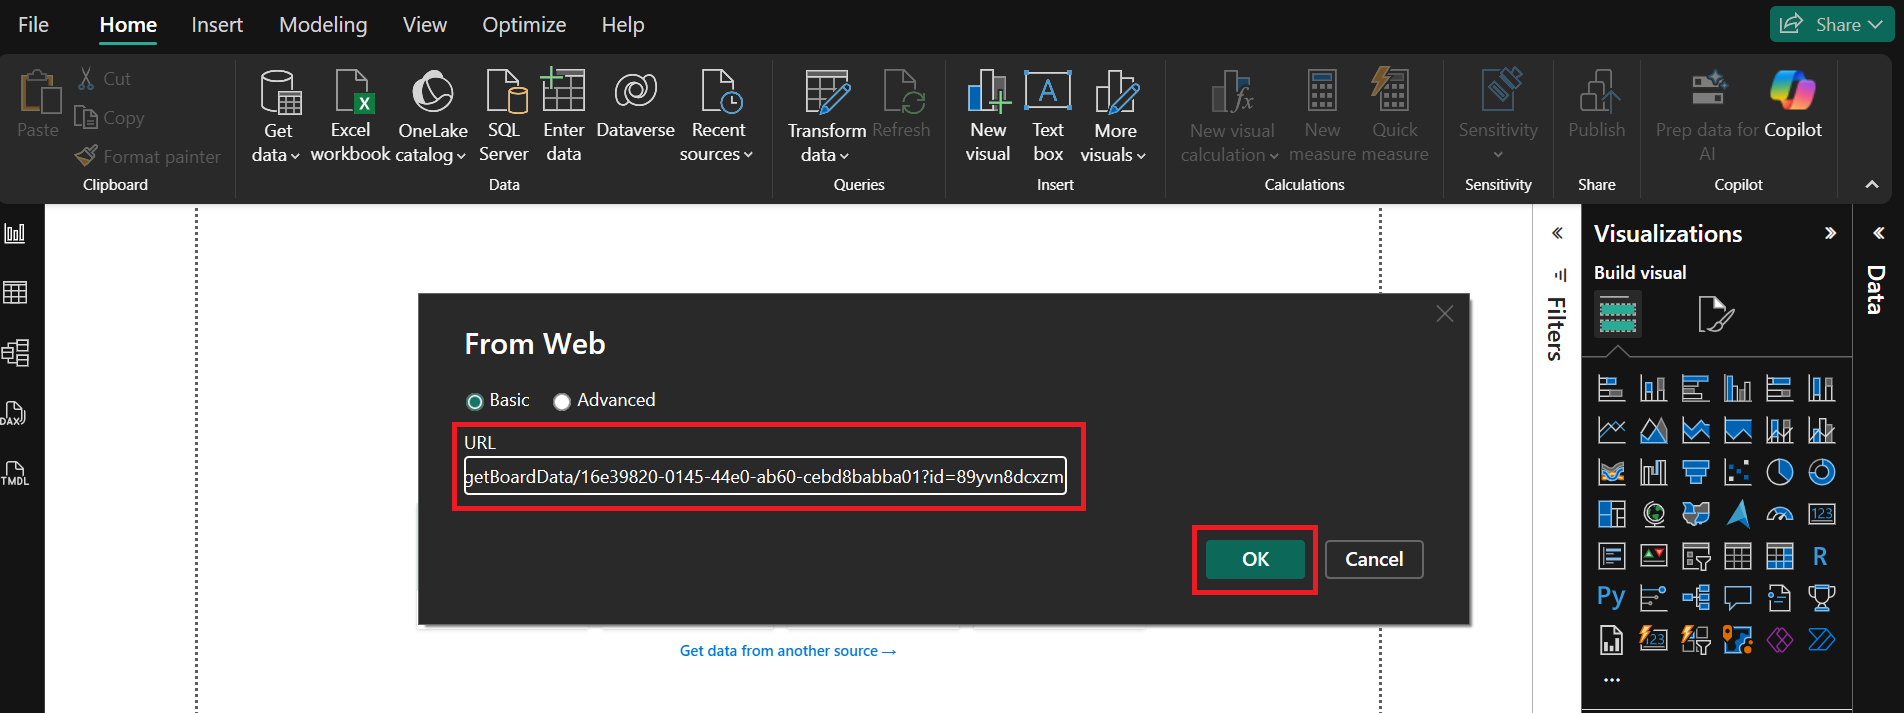
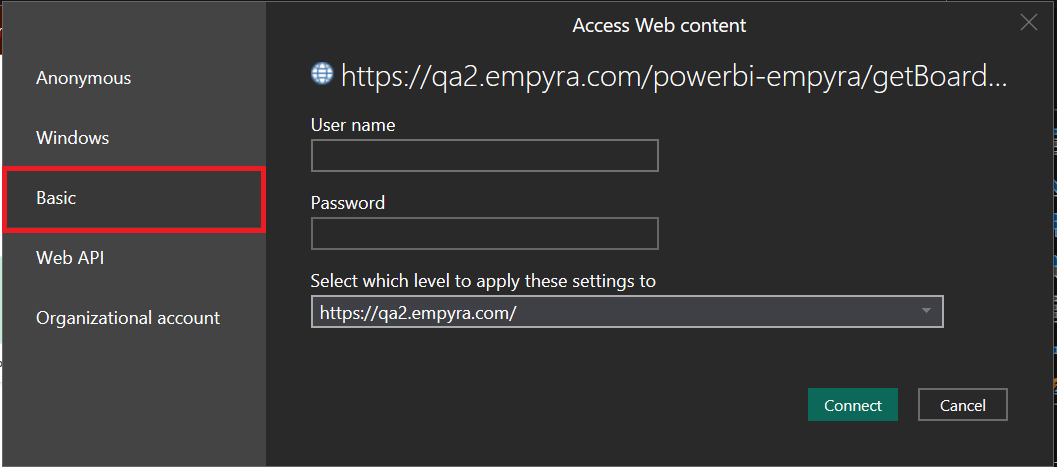
Access Web Content window will appear.
One-time access is required to establish a secure connection between monday.com board data and Power BI.
Step 7: Click on the Basic option.
Step 8: Go to the Power BI Configuration window and click on Copy Token from the more actions menu to Copy Authentication Token.
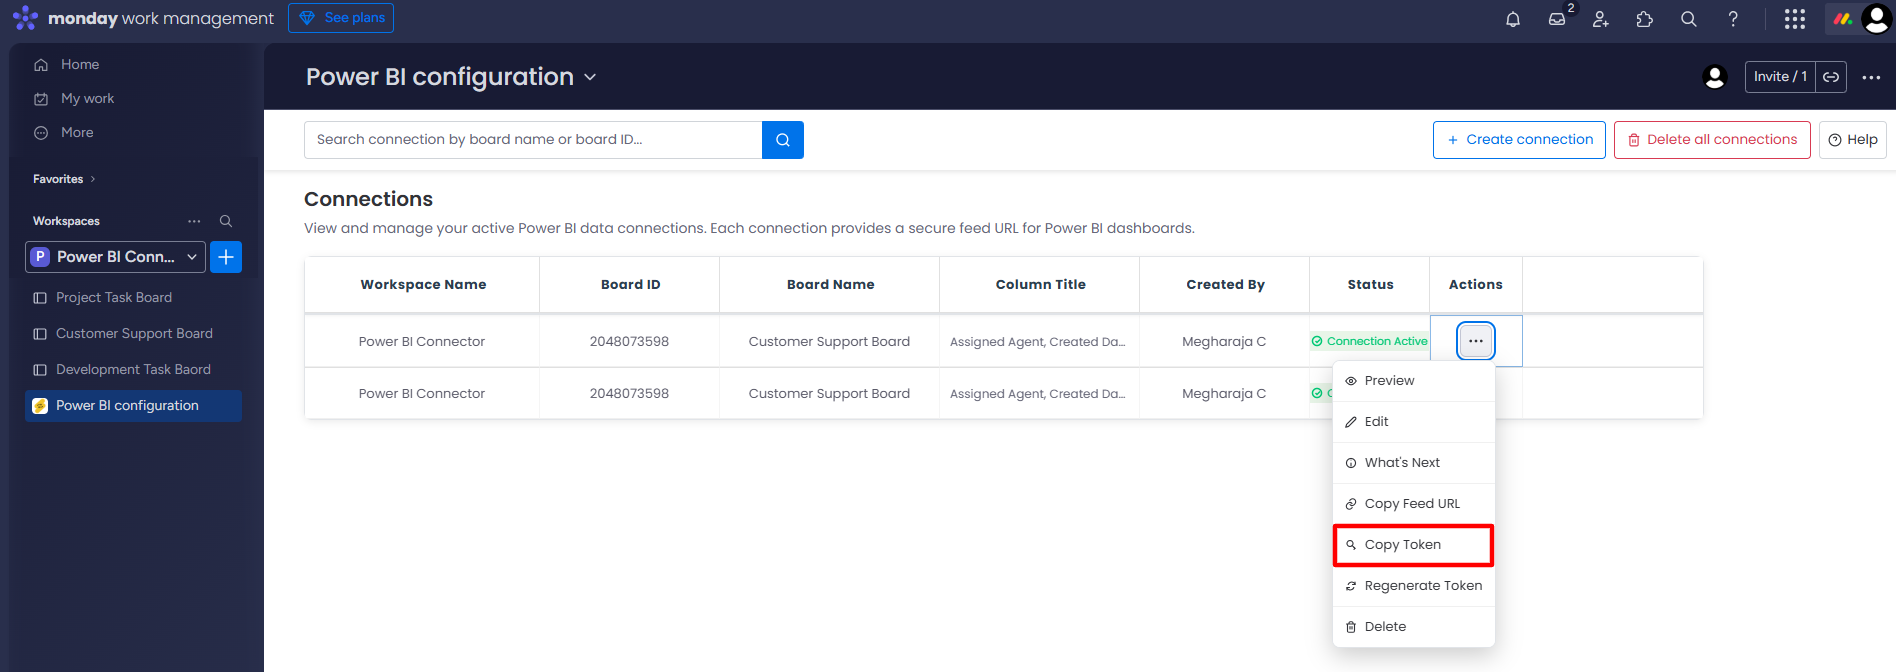
Step 9: Go to the Power BI Access Web Content window and paste the token in the password box.
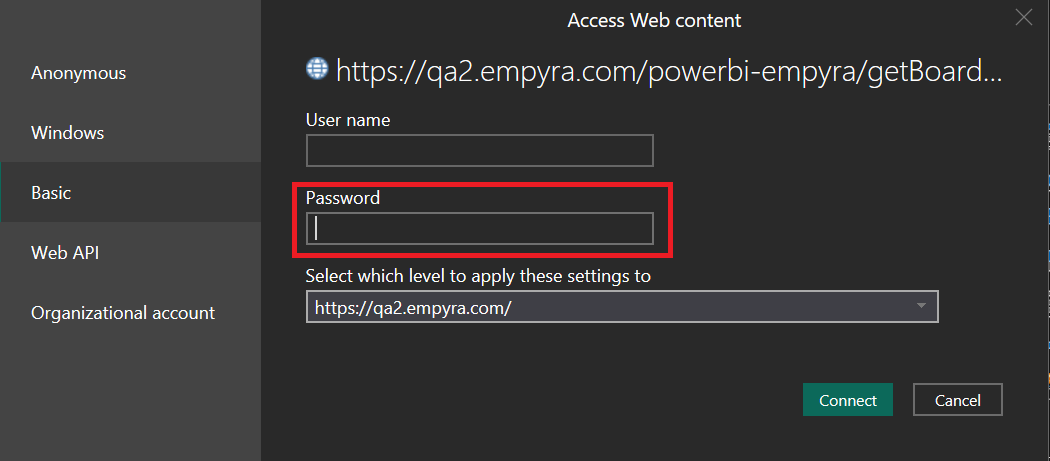
Step 10: Next, click on the Connect button.
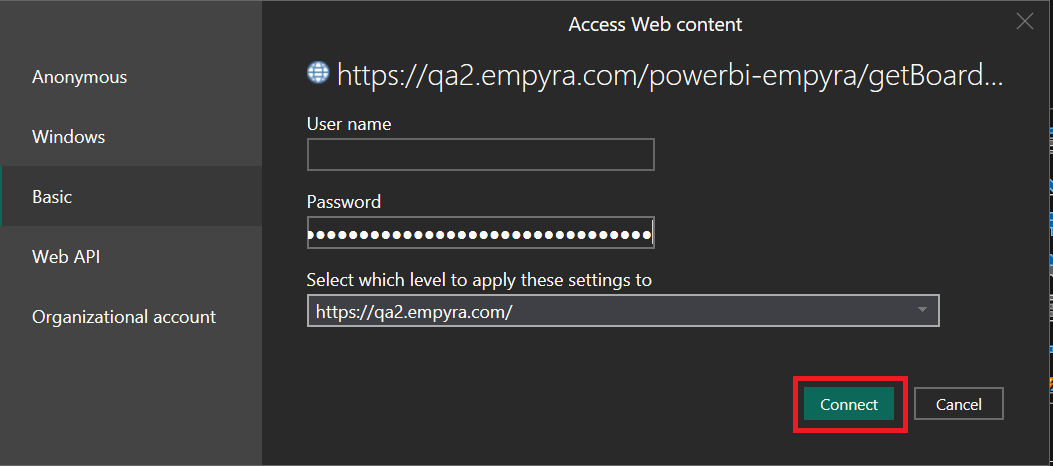
monday.com board data will be synced to the Power Query Editor window.
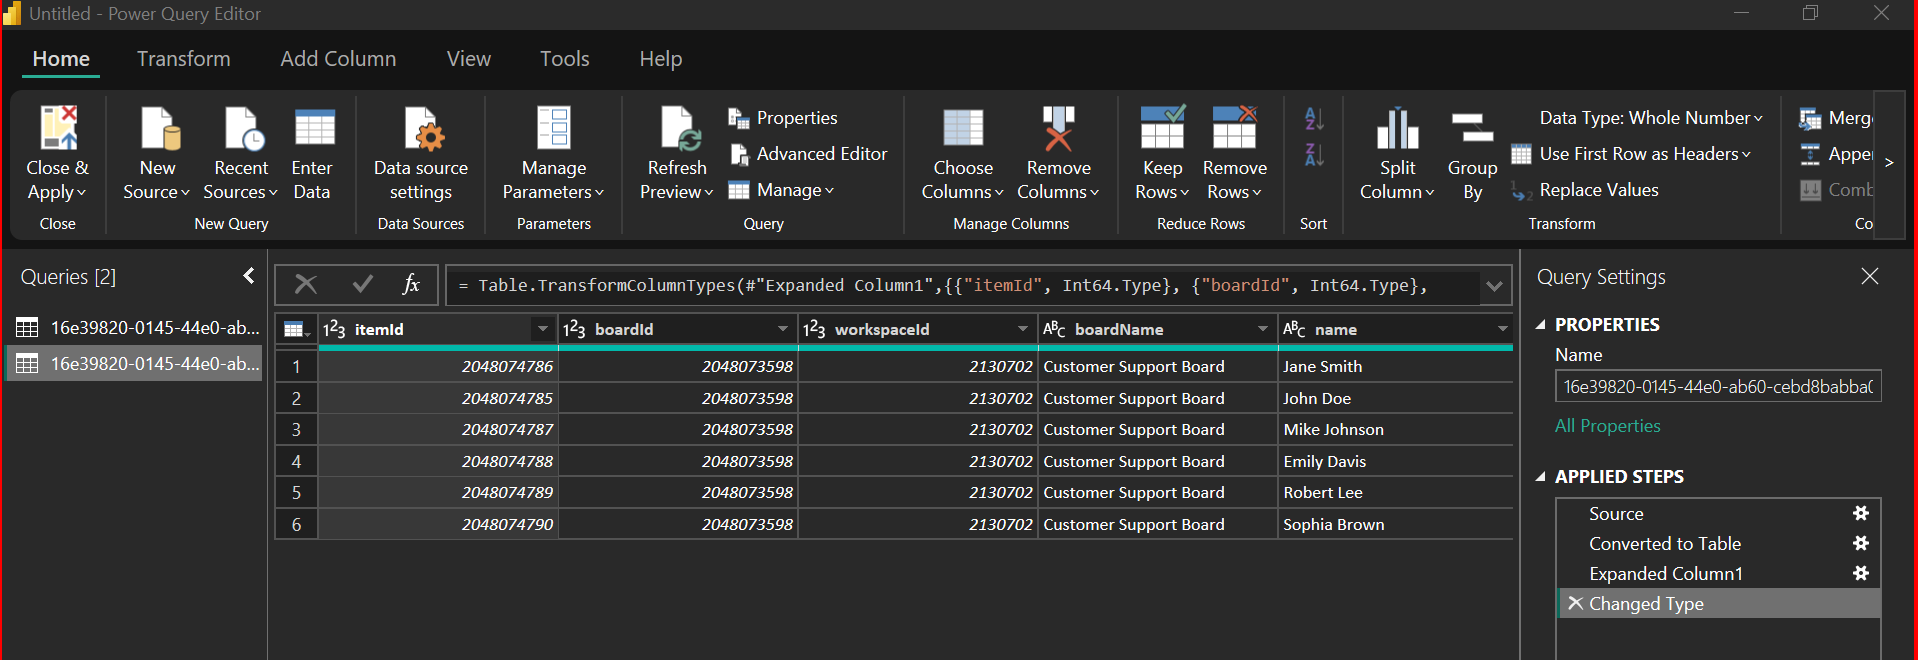
Start building reports, visuals, and an interactive dashboard for your monday.com board data on the Power BI platform.
4. Embed Power BI reports into monday.com
Power BI Connector allows users to integrate reports, dashboards, and data visuals directly into monday.com. So users can interact with data without leaving the monday.com platform.
Follow the steps below to embed a Power BI report:
If you already have the published link of the Power BI report, proceed directly to Step 9.
Step 1: Go to the Power BI report and click on publish.
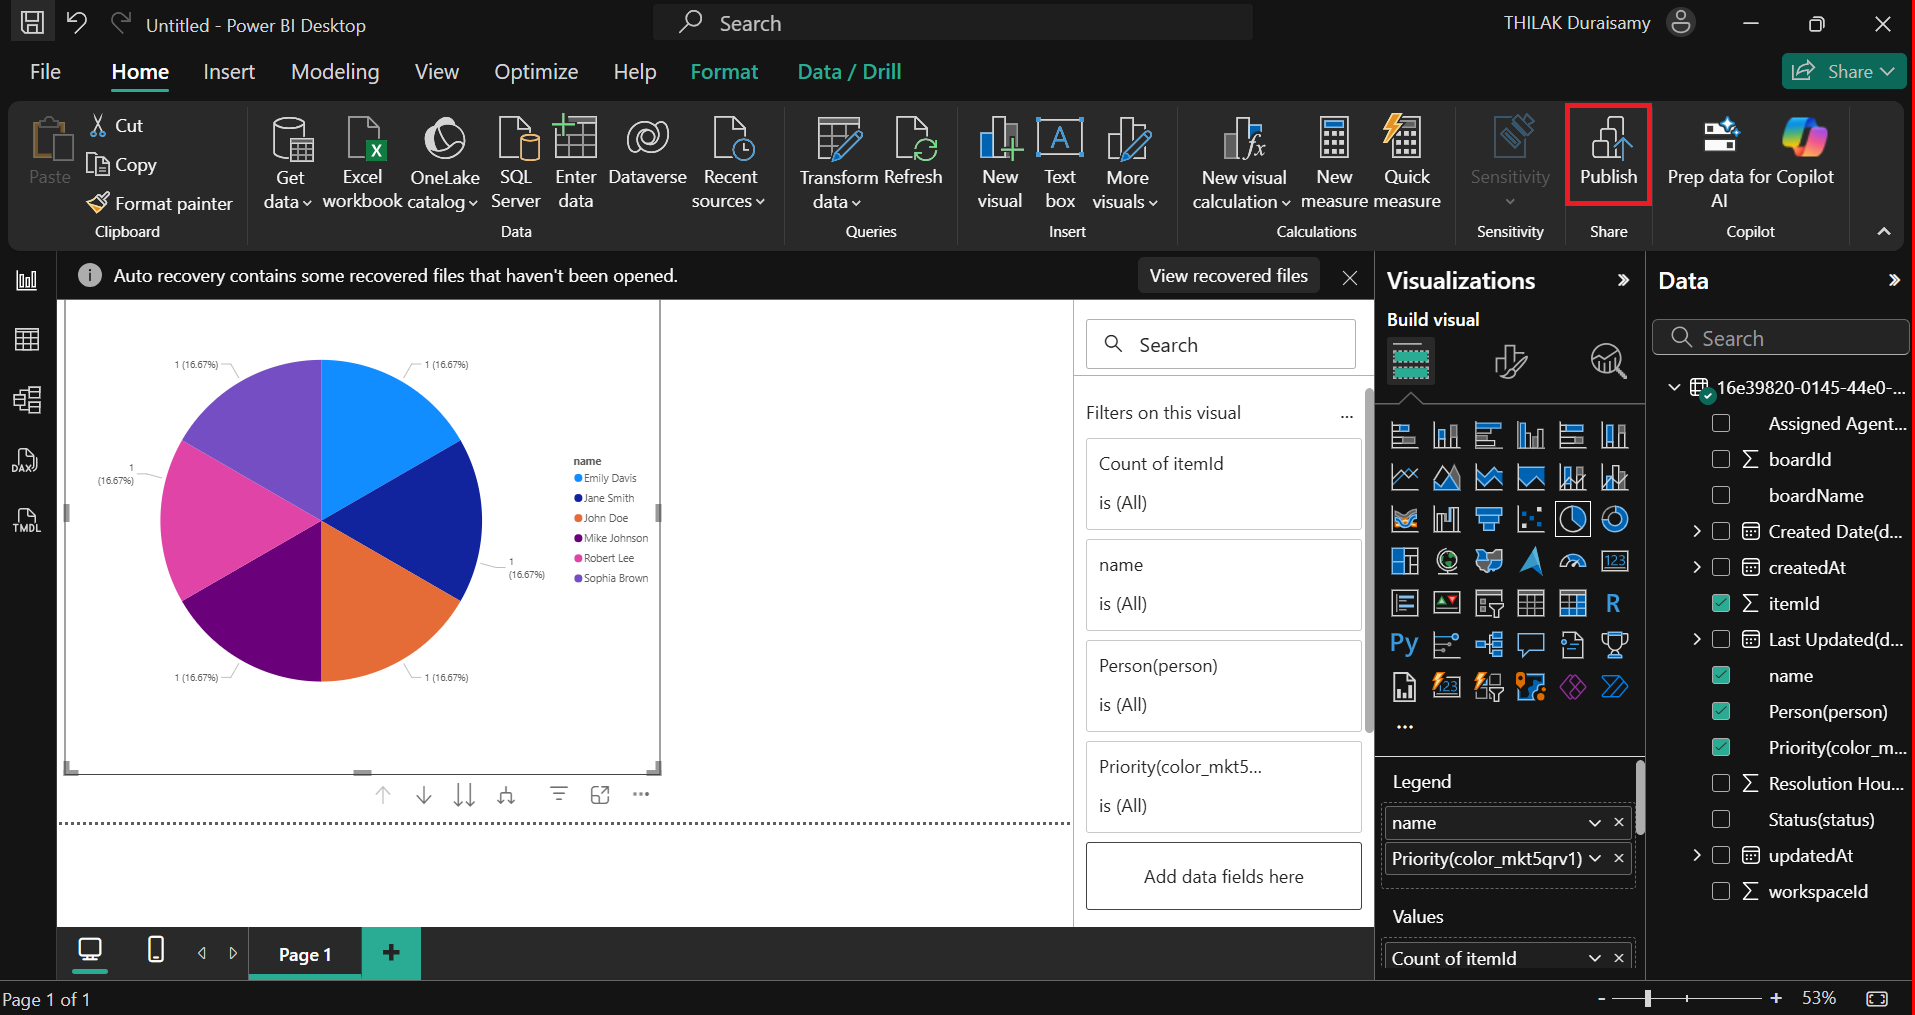
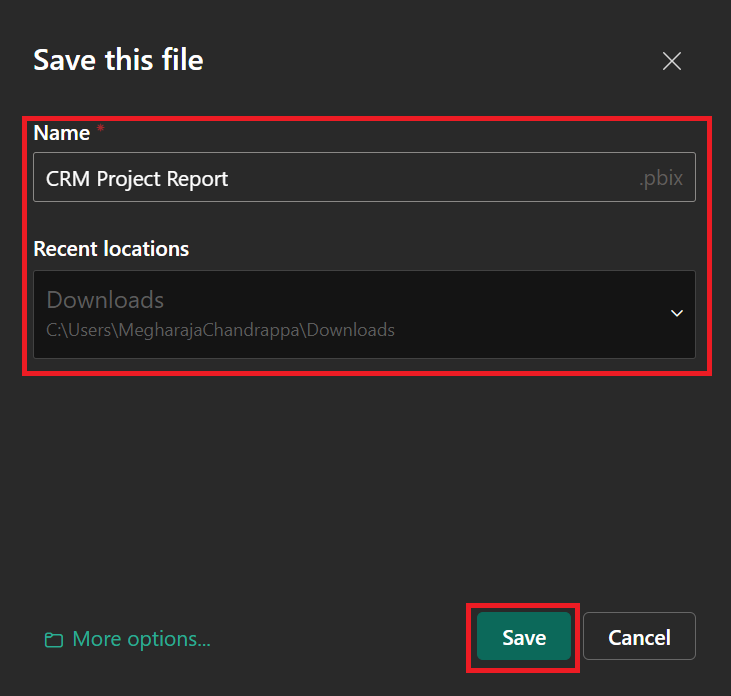
Save the file before embedding it in monday.com board.
Step 2: Enter the file name and location. Then, click on the Save button.
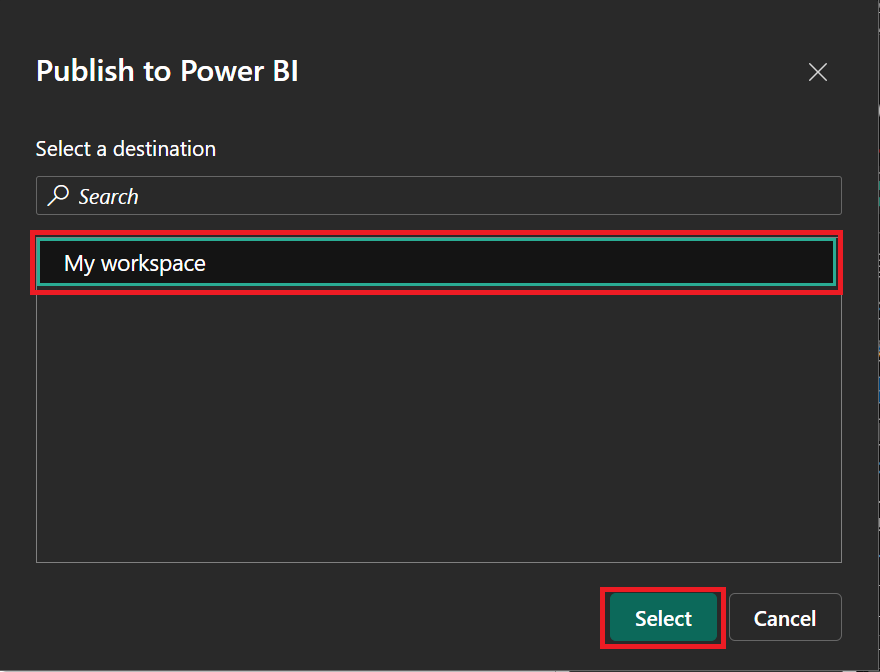
Step 3: Next, select a destination to publish the file and click on the Select button.
Step 4: After publishing, click on the file name.
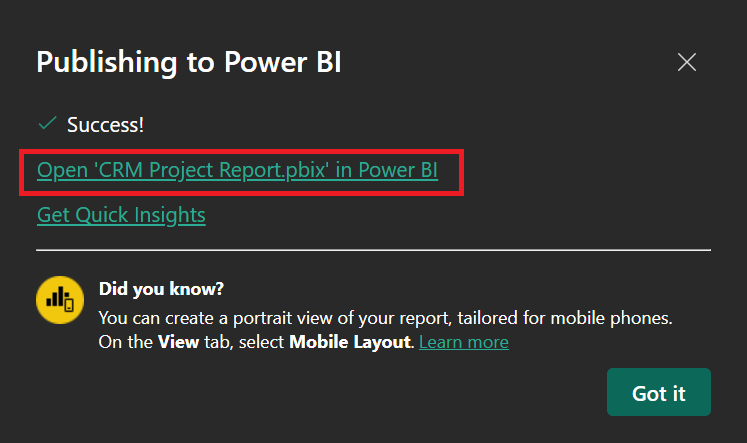
The published report will be opened on the Power BI web application.
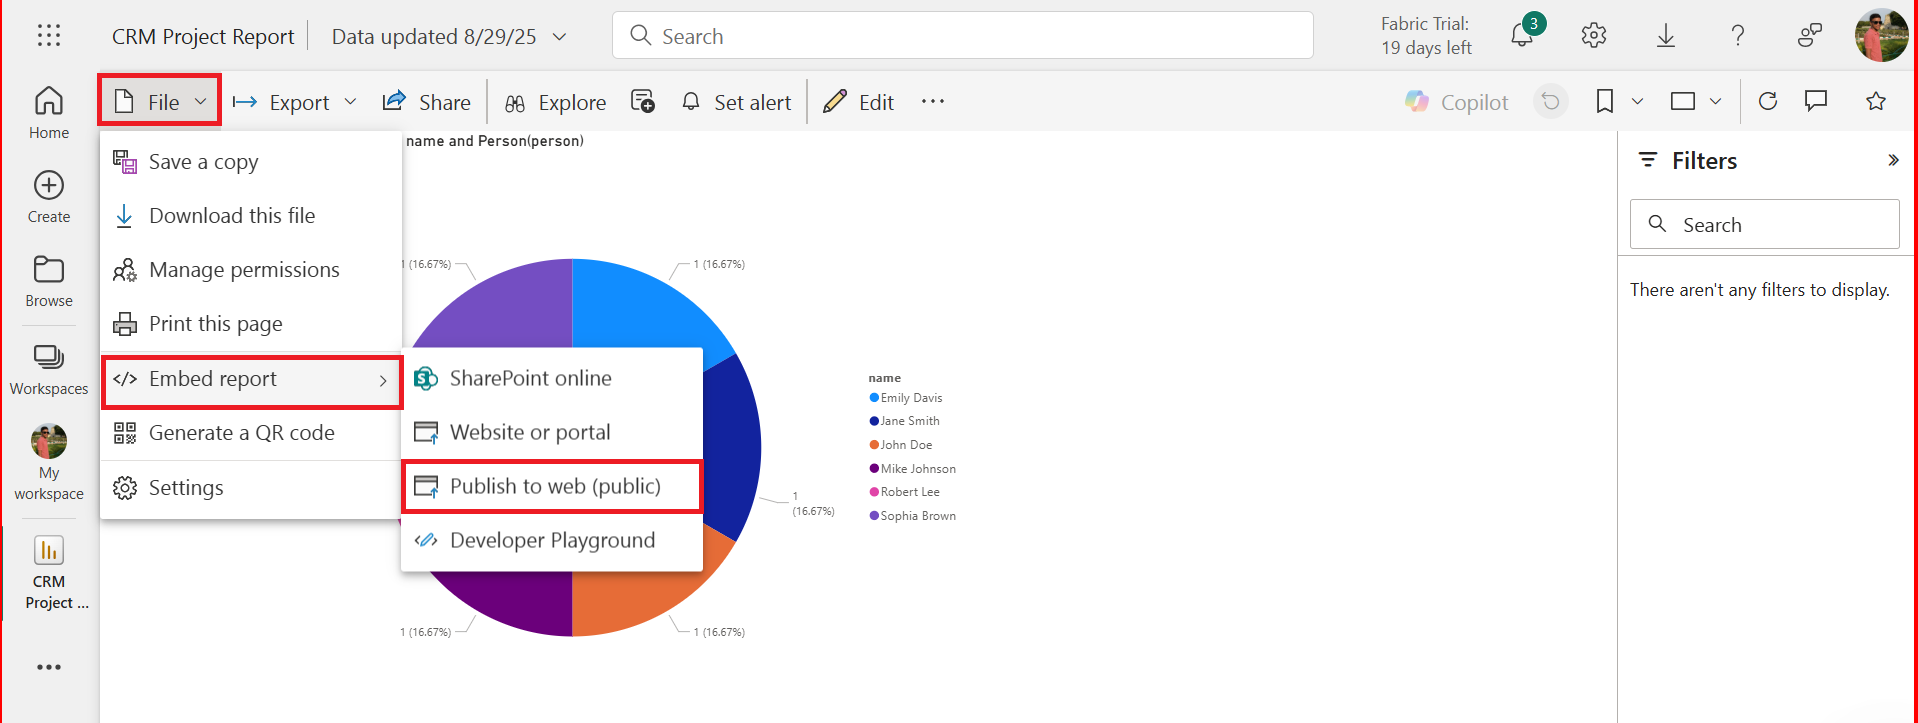
Step 5: Click on the File dropdown -> Select the Embed report option -> Click on the Publish to web (public) option.
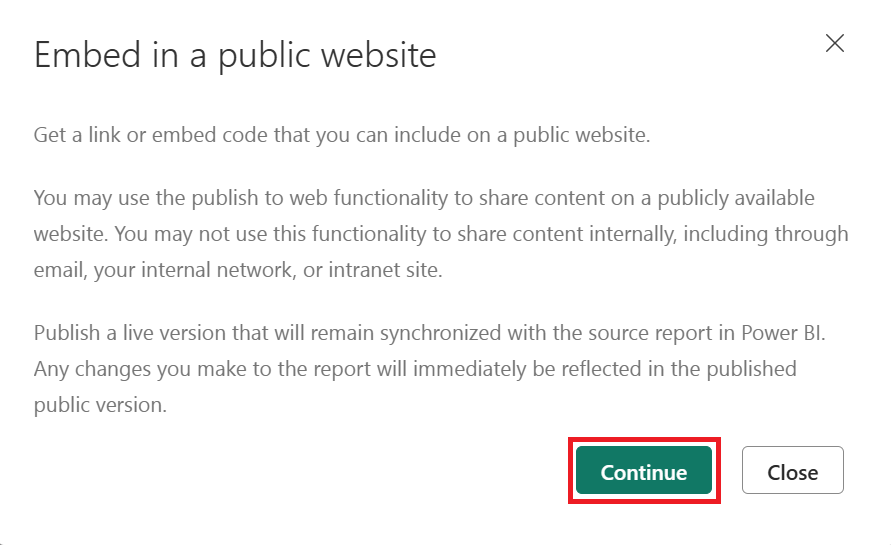
Step 6: Next, click on the Continue button.
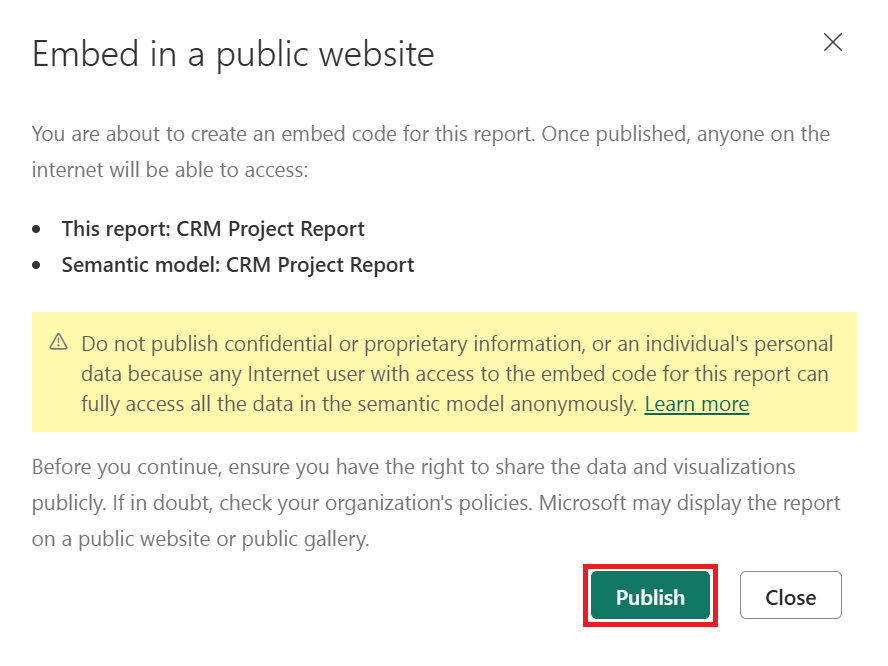
Step 7: Click on the Publish button.
Step 8: Copy the published content link.
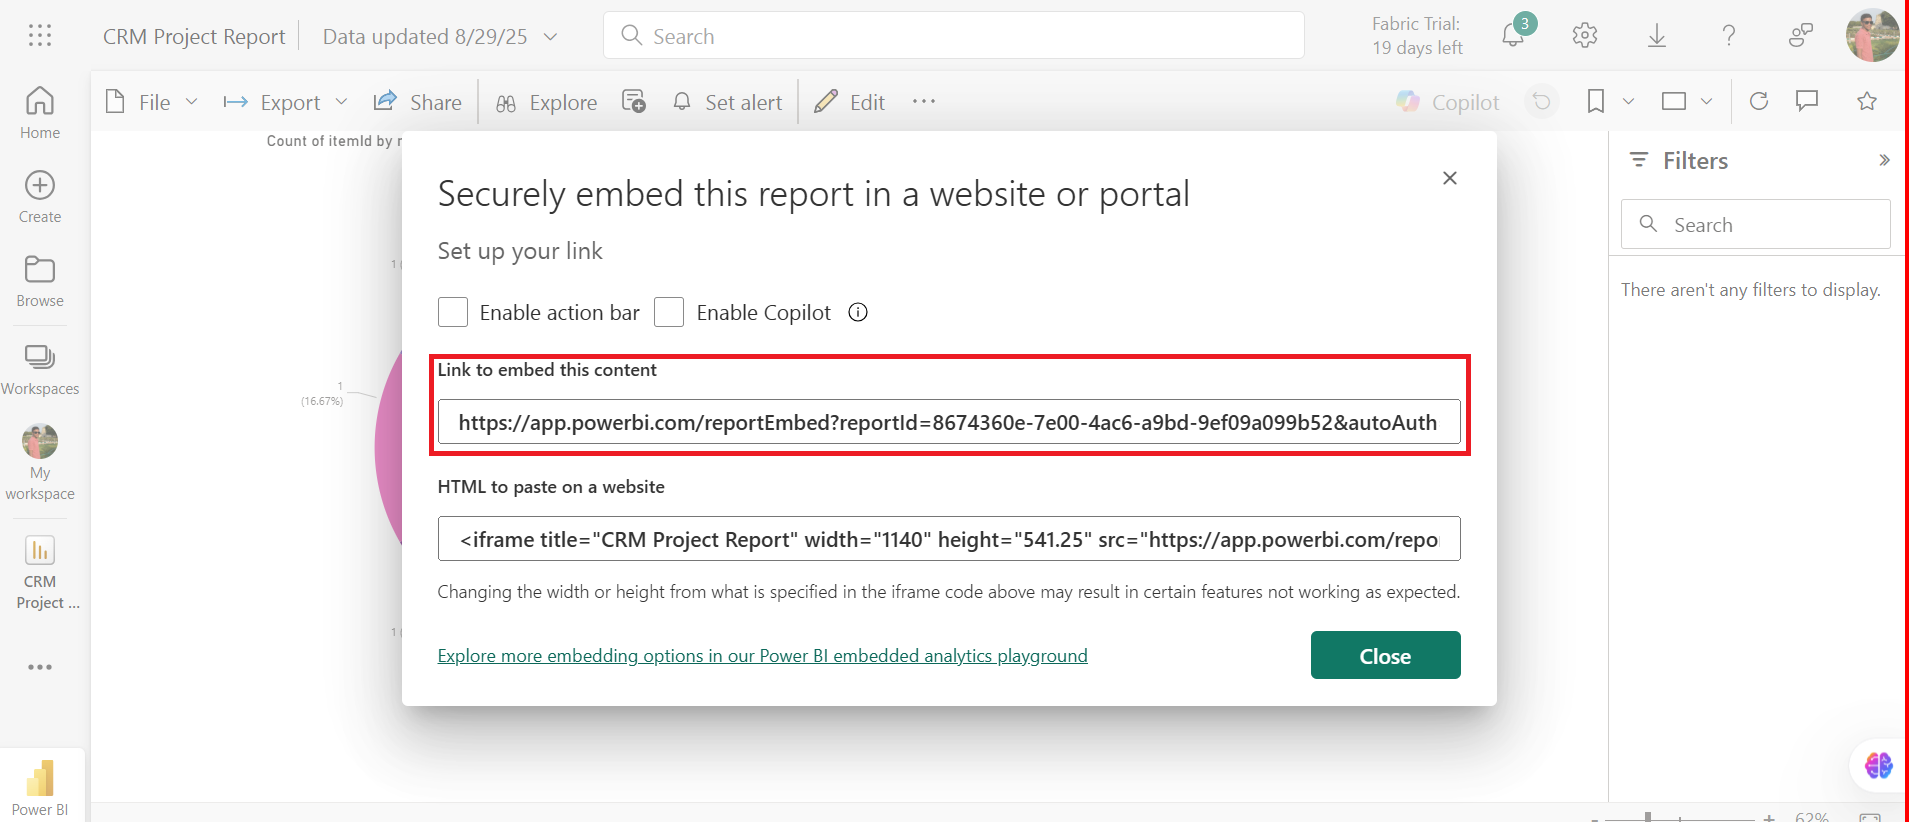
Next, paste the link on monday.com board embedder view.
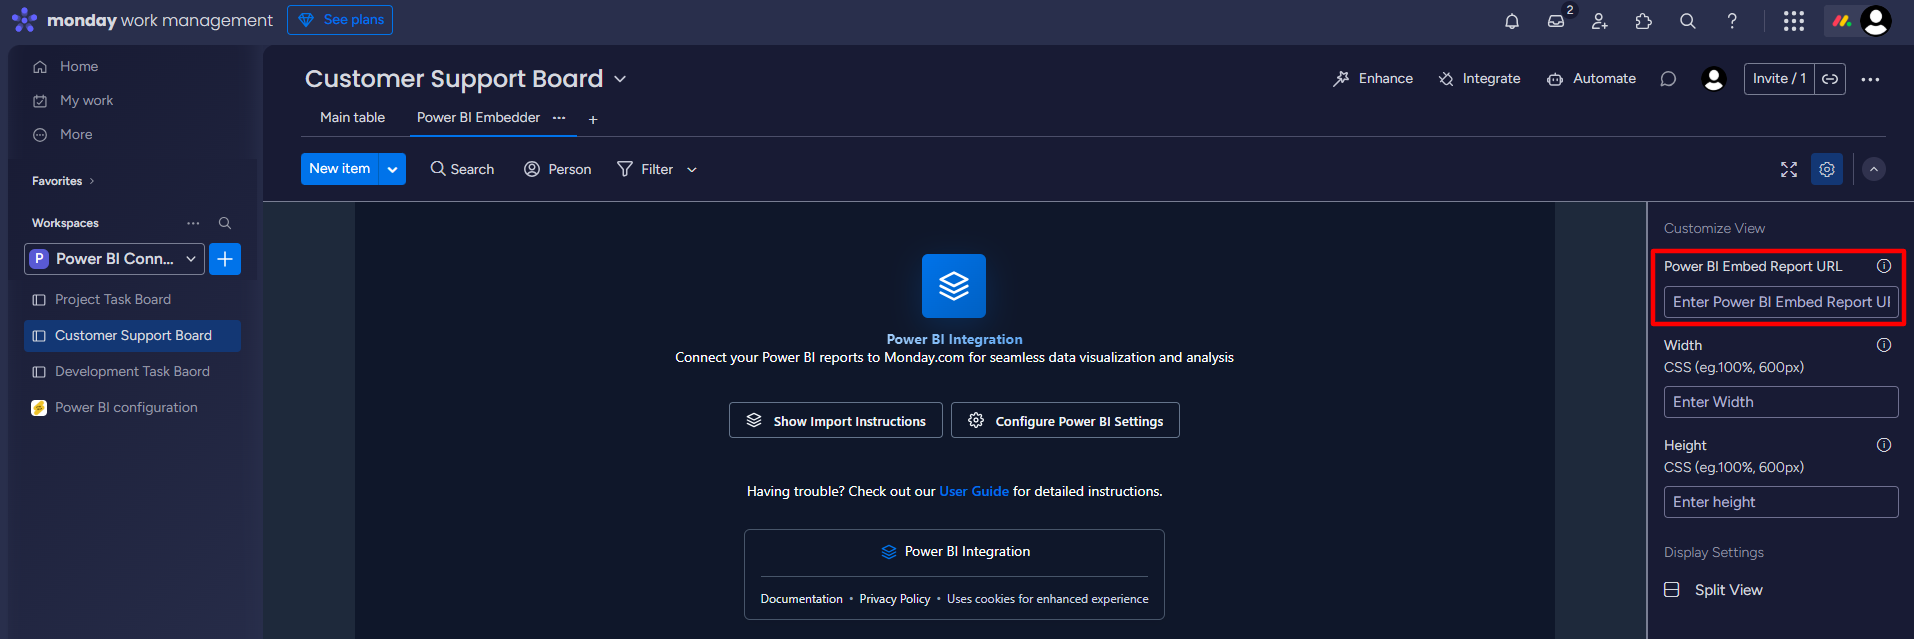
Step 9: Open the Power BI Embedder view on monday.com board.
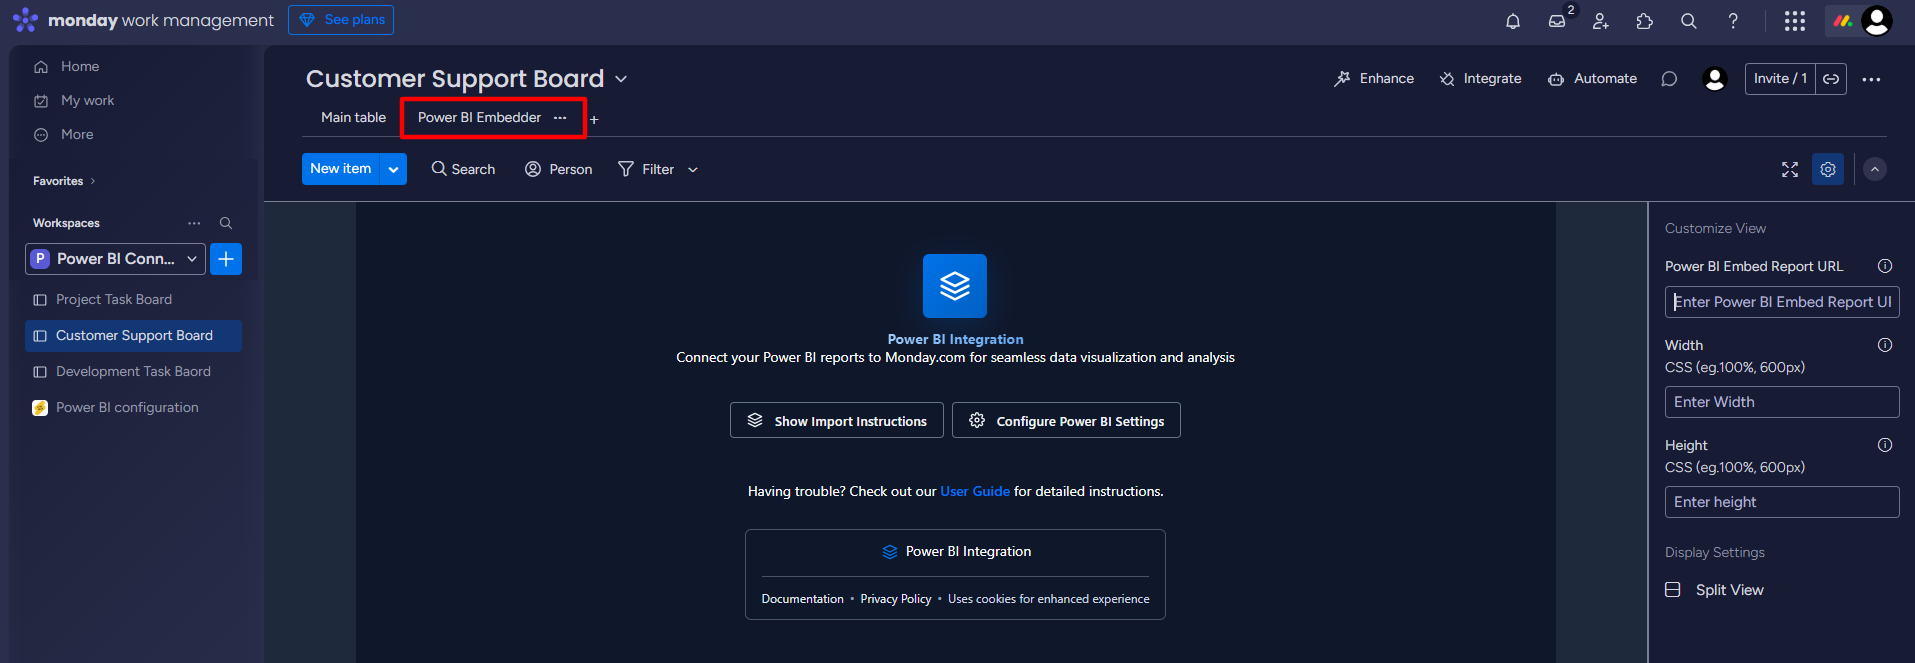
Step 10: Paste the published content link in the Power BI Embed Report URL field.
Step 11: Sign in to your Power BI account.
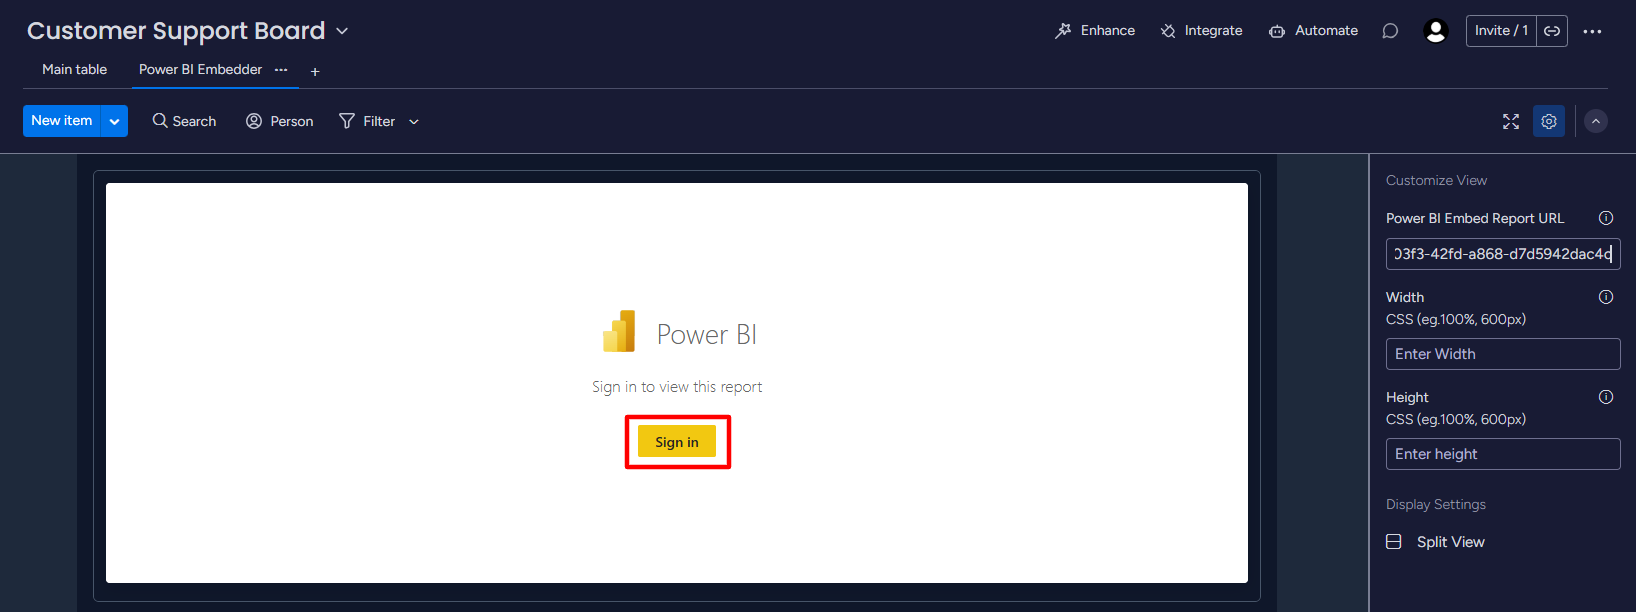
Power BI report will be embedded into monday.com board.