

REST messages allow ServiceNow to communicate with monday.com through API calls. This configuration ensures that ServiceNow records and attachments are properly synced between both platforms in real-time.
The user must complete the REST Message configuration for the following cases:
Case 1 - Creating and Updating an item.
This configuration ensures that when a record is created or updated in ServiceNow, a corresponding item in monday.com is either created or updated.
Case 2 - Uploading an Attachment.
This configuration ensures that any attachment added to an incident or task in ServiceNow is automatically synced and reflected in the corresponding item on monday board.
Follow the steps below to configure REST messages on the ServiceNow platform.
Step 1: Go to your ServiceNow account.
Step 2: Click on All -> Search REST Message -> Click on REST Message under System Web Services.
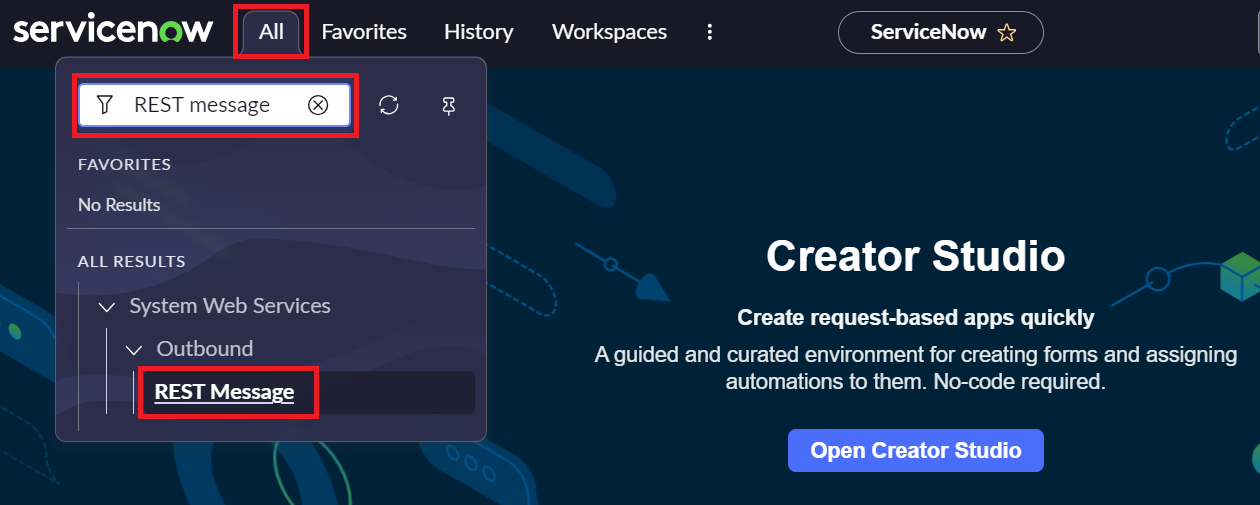
Step 3: Click on New.

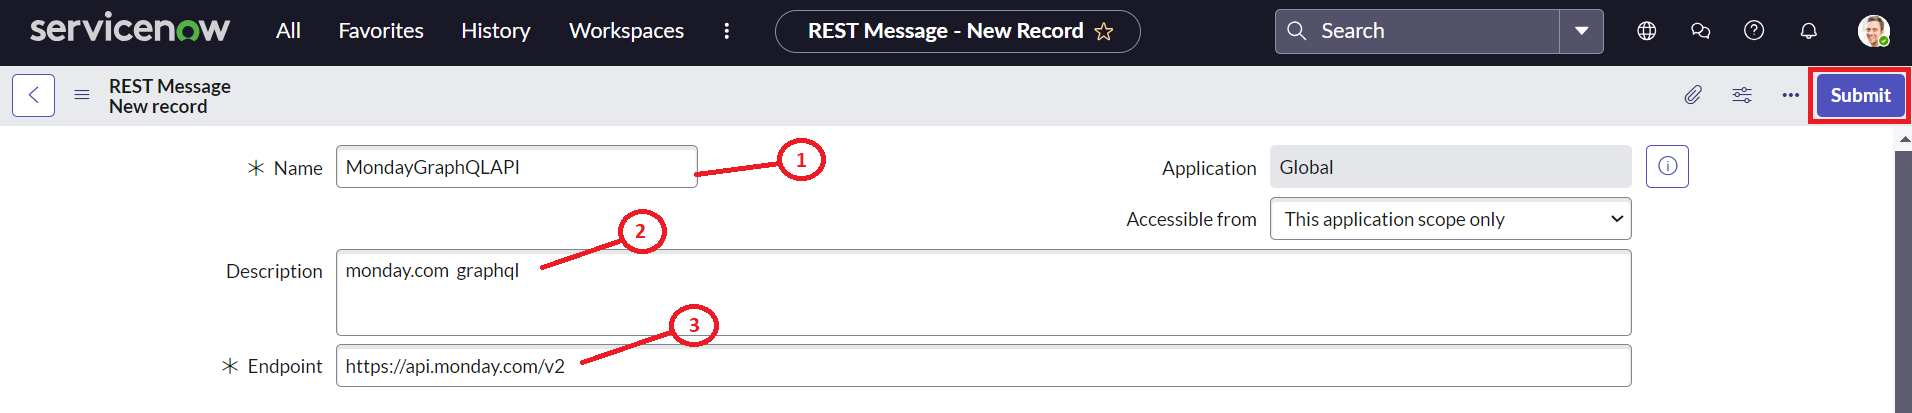
REST Message New record window will appear.
Step 4: Configure REST Messages for the following cases.
Case 1 - Creating and Updating an item
-
Add Name - MondayGraphQLAPI
-
Add Description - monday.com graphql
-
Add Endpoint - https://api.monday.com/v2
-
Click on Submit.
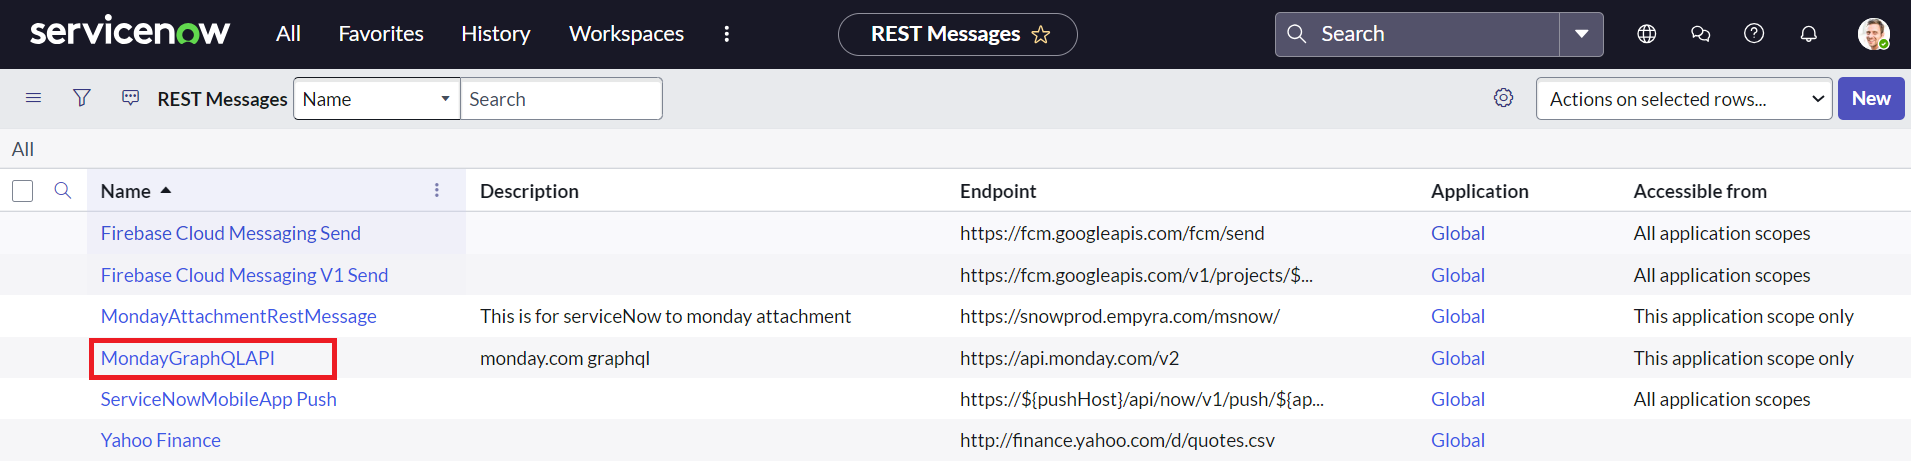
After submitting, you will be redirected to the REST Message window.
-
Click on MondayGraphQLAPI
-
Go to HTTP Methods. Click on New.

-
Add below HTTP Methods.
1. fetchBoardData
-
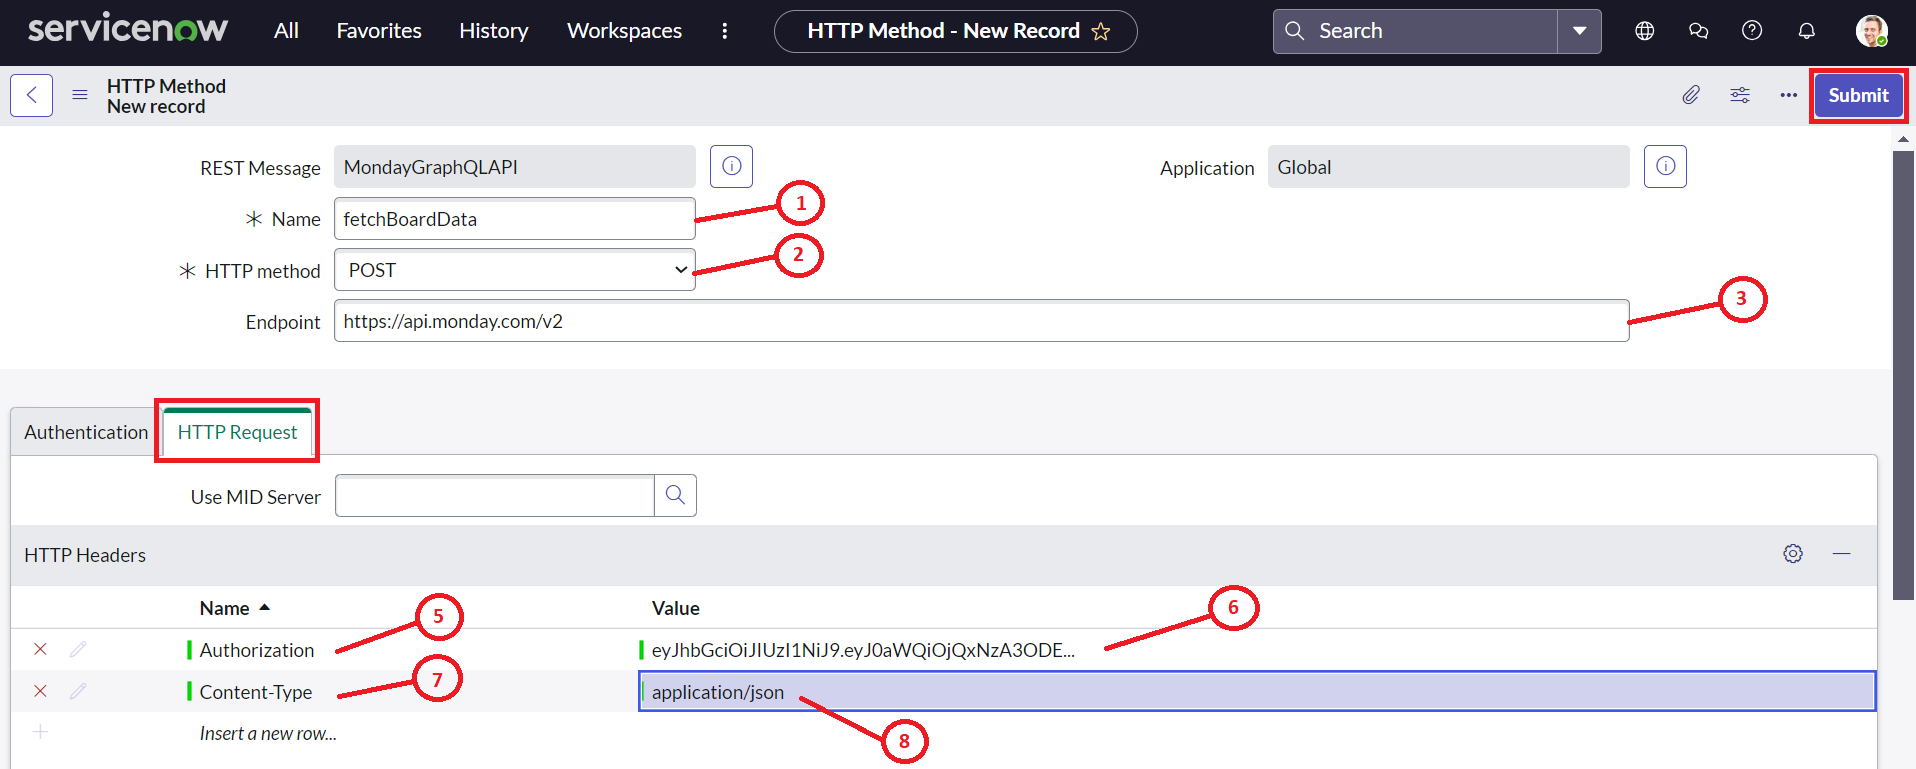
Add Name - fetchBoardData
-
Select HTTP Method - POST
-
Add Endpoint - https://api.monday.com/v2
-
Go to HTTP Headers.
-
Double-click on Name and enter Authorization.
-
Double-click on Value and add your monday service user ID access token.
-
Double-click on Name and enter Content-Type.
-
Double-click on Value and add application/json.
-
Click on Submit.
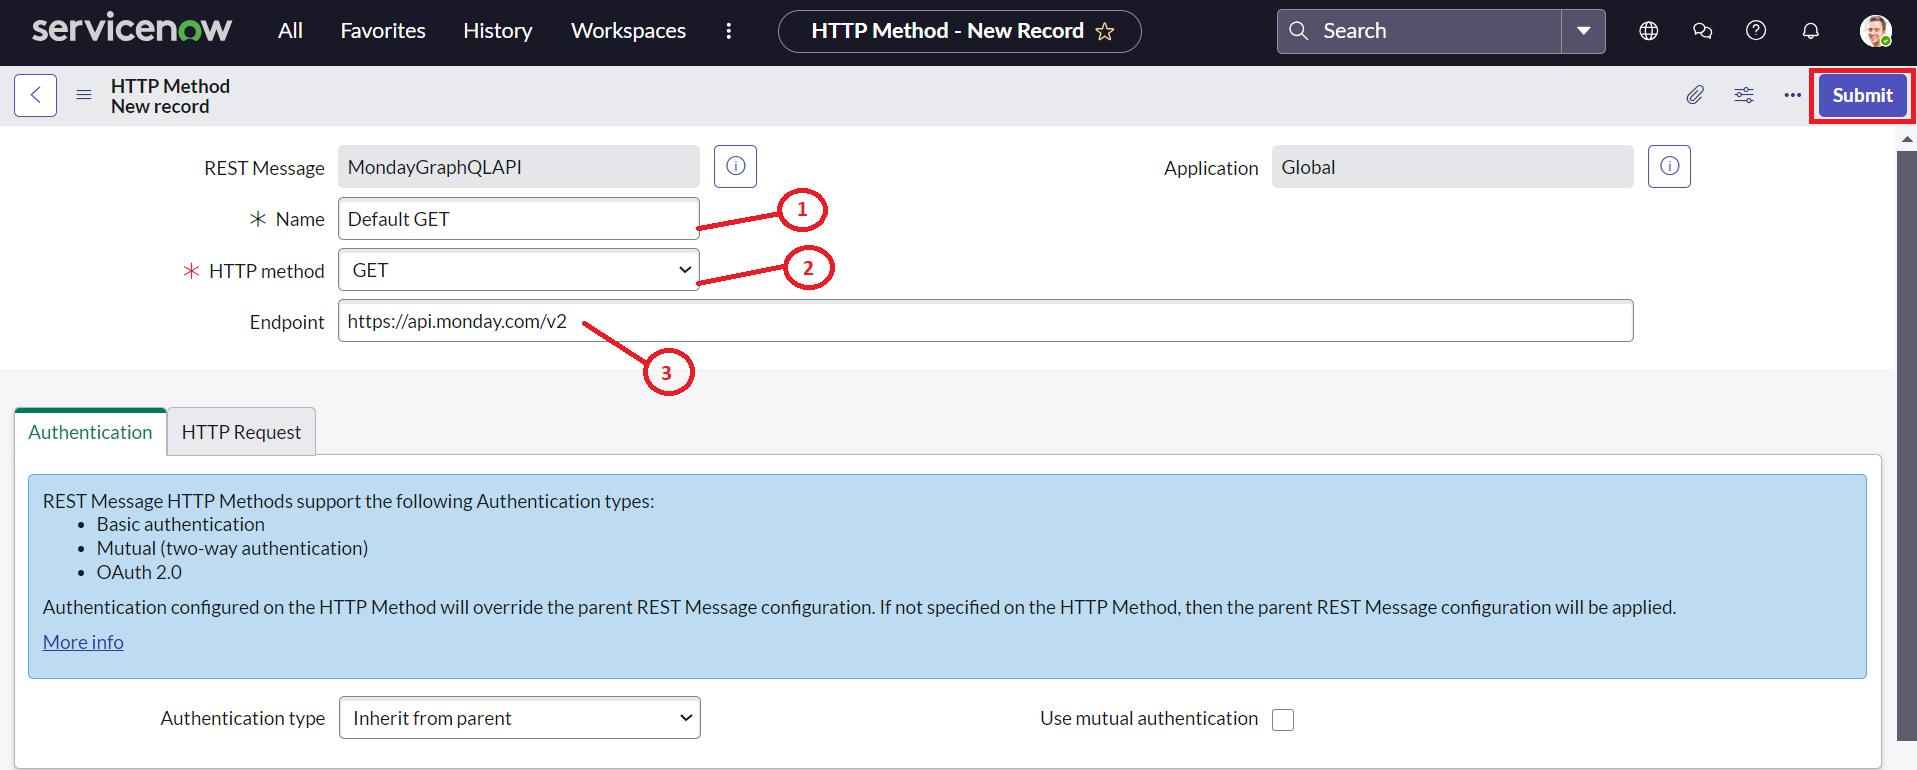
2. Default GET
-
Add Name - Default GET
-
Select HTTP Method - GET
-
Add Endpoint - https://api.monday.com/v2
-
Click on Submit.
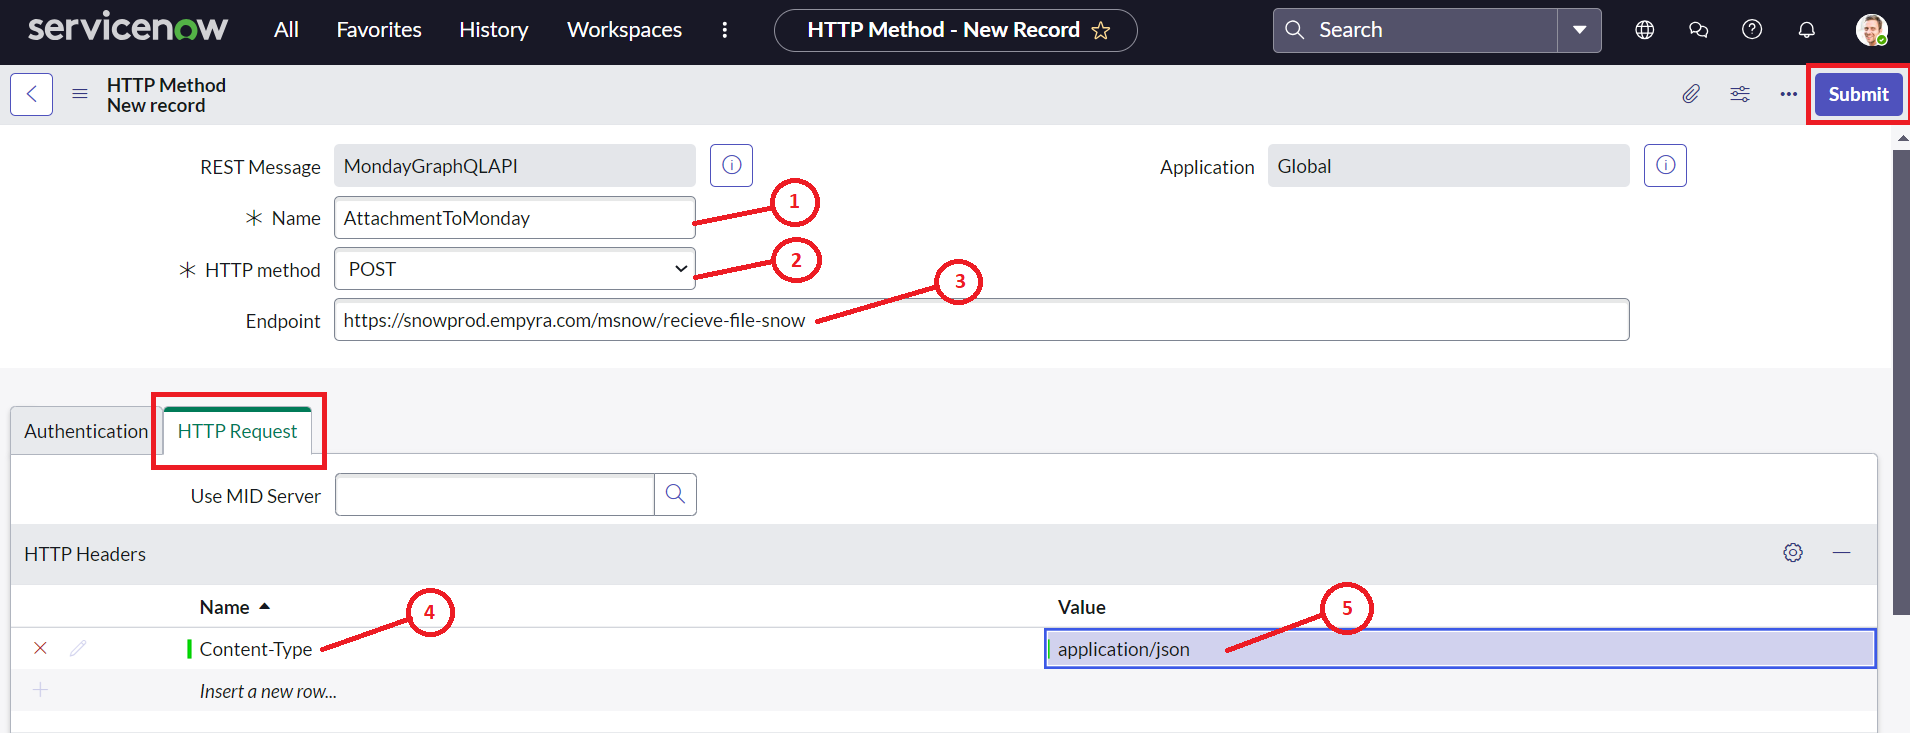
3. AttachmentToMonday
-
Add Name - AttachmentToMonday
-
Select HTTP Method - POST
-
Add Endpoint - https://snowprod.empyra.com/msnow/recieve-file-snow
-
Go to HTTP Headers.
-
Double-click on Name and enter Content-Type.
-
Double-click on Value and add application/json.
-
Click on Submit.
MondayGraphQLAPI REST Message will be configured successfully.
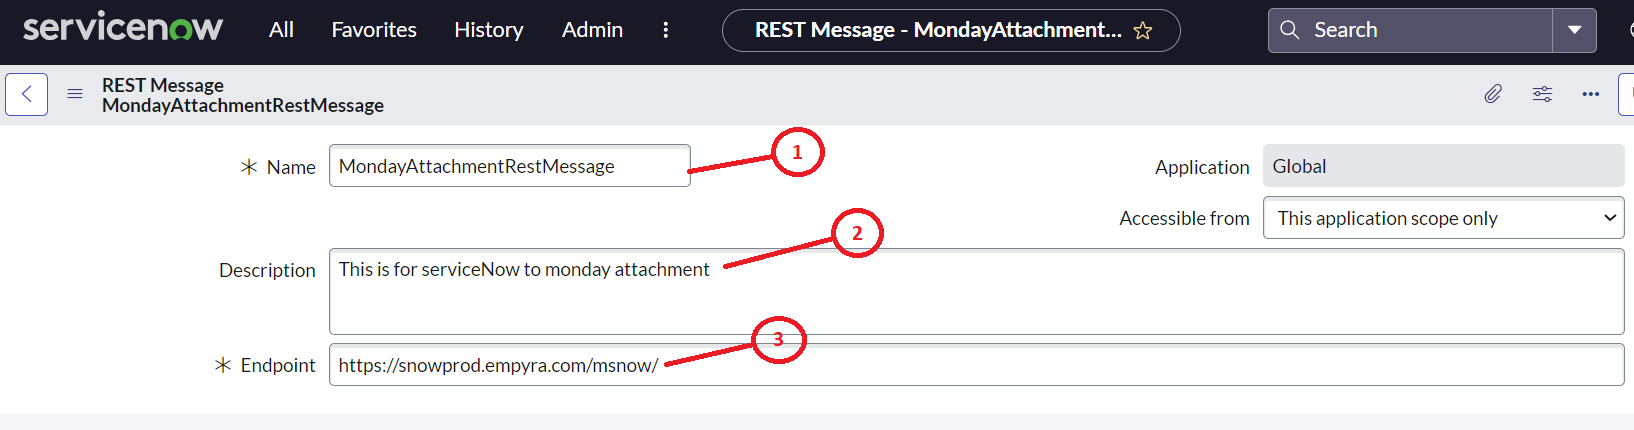
Case 2 - Uploading an Attachment.
-
Add Name - MondayAttachmentRestMessage
-
Add Description - This is for service to monday attachment
-
Add Endpoint - https://snowprod.empyra.com/msnow/
-
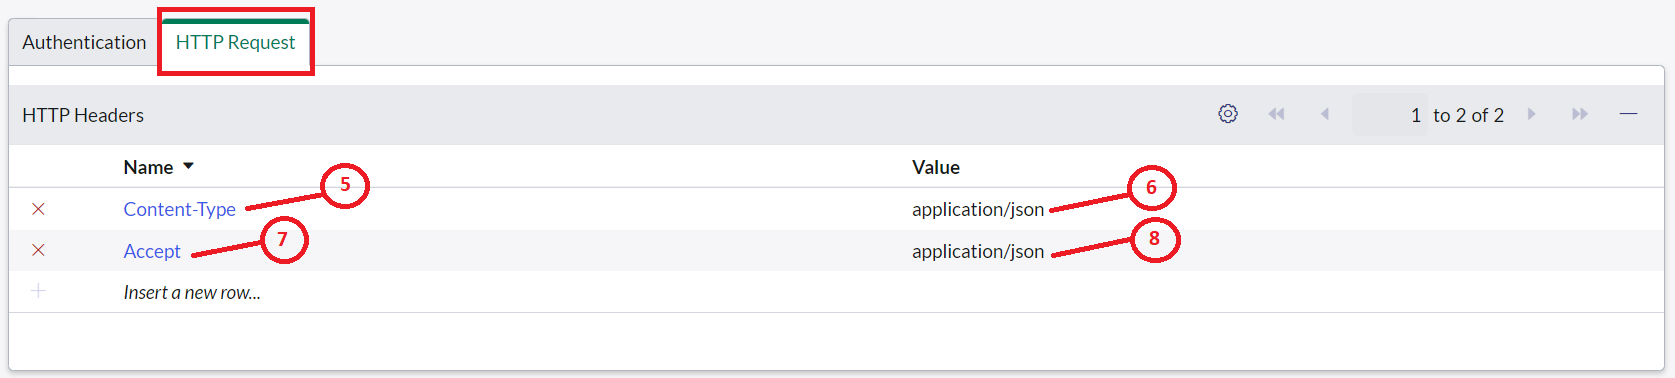
Click on HTTP Request.
-
Double-click on Name and enter Content-Type.
-
Double-click on Value and add application/json.
-
Double-click on Name and enter Accept.
-
Double-click on Value and add application/json.
-
Click on Submit.
After submitting you will be redirected to the REST Message window.
-
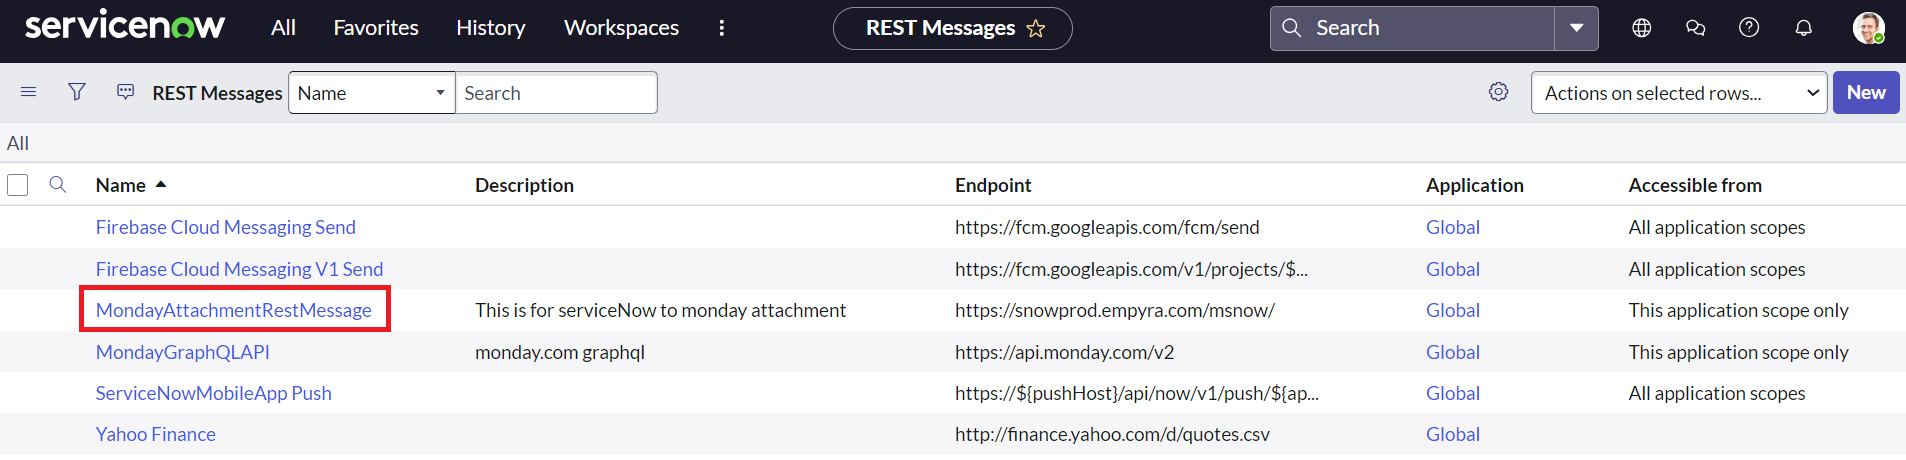
Click on MondayAttachmentRestMessage.
-
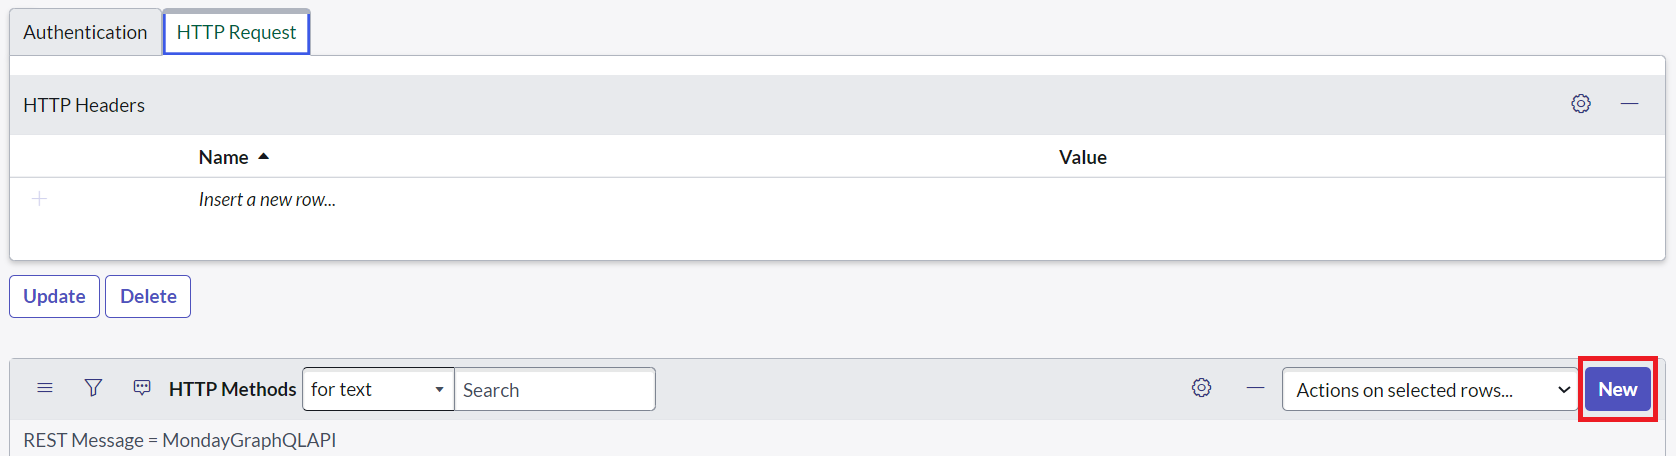
Go to HTTP Methods. Click on New.
-
Add below HTTP Method.
1. ServiceNowMondayAttachement
-
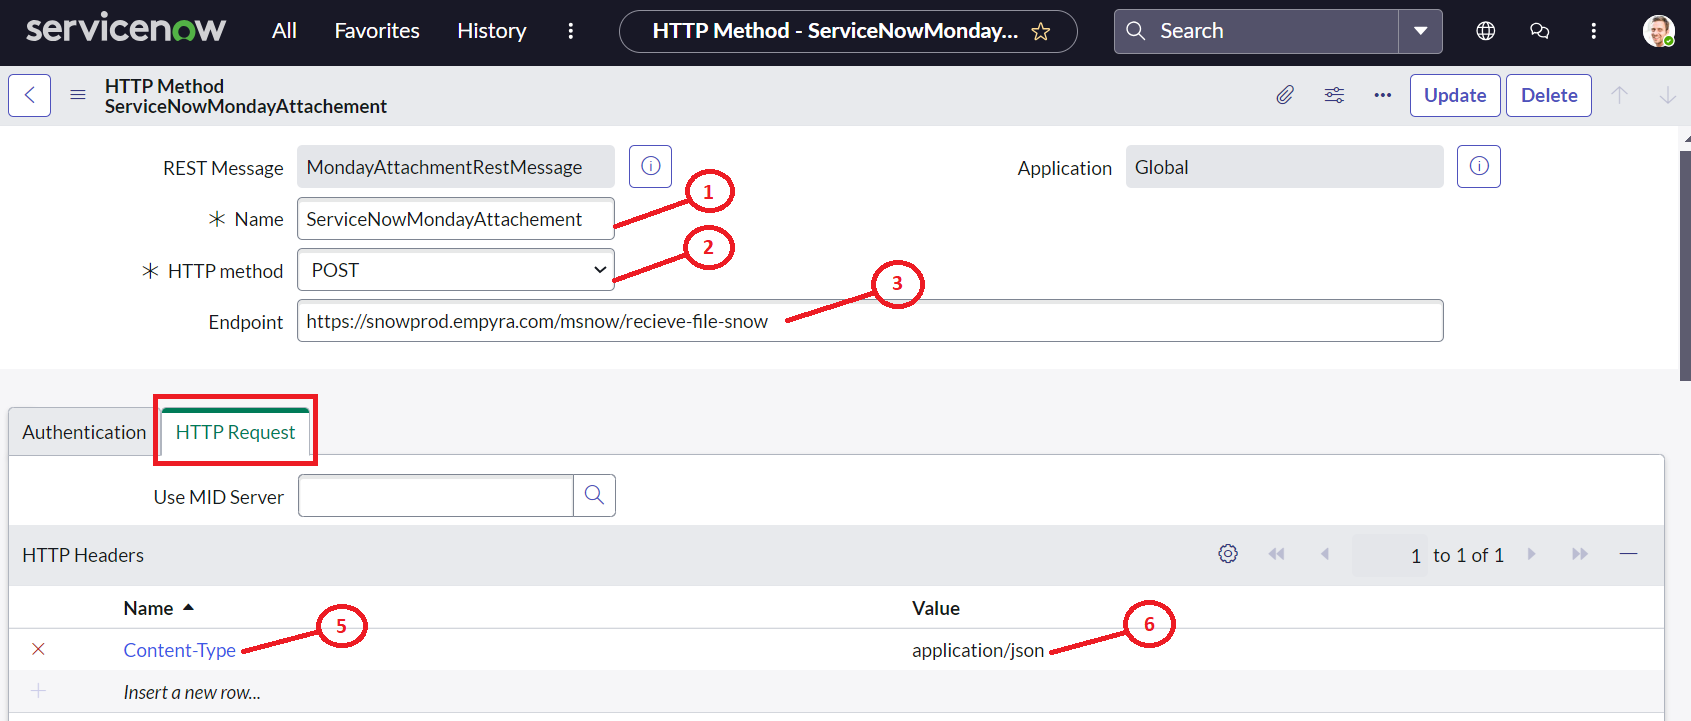
Add Name - ServiceNowMondayAttachement
-
Select HTTP Method - POST
-
Add Endpoint - https://snowprod.empyra.com/msnow/recieve-file-snow
-
Go to HTTP Headers.
-
Double-click on Name and enter Content-Type.
-
Double-click on Value and add application/json.
-
Click on Submit.
MondayAttachmentRestMessage will be configured successfully.
Once the REST Message configuration is completed, your ServiceNow setup is fully integrated. The next step is to add Recipes to your monday boards to automate workflows.